In my previous post, I just set up the game and drew a red box that was the player and it could be dropped down. Today I add gravity to the player, set the player’s movement, draw the background, create collision blocks, and draw the player image and its animation.
Gravity
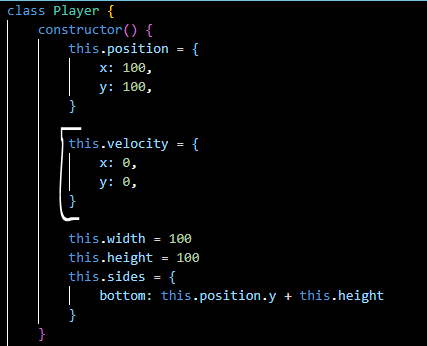
In the Player class in the “Player.js” file, add one more object is velocity, and its x and y is equal to 0. In the update() function, make the player’s y coordinate plus the y of the velocity. And when it is check if the player bottom added the y of the velocity is smaller than the height of the canvas, make the y of the velocity add 1.

As you can see in the video above, the player falls faster but it falls off the game screen. To fix this, we just need to add one more line of code. Make the y of the velocity equal 0 when the player’s y coordinate is larger than the height of the canvas. After you run the code, the player is stand on the bottom of the canvas.

Create another object with gravity equal to 1. And add y of the velocity to it.

Player Movement
To control the player, I used keyup and keydown events to set player control. The “w” key means the player can jump, the “a” key turns left and the “d” key turns right. All the steps that make the player move are in this section.
Jump
In the “index.js” file, add an event to the window and make it check if the keydown is “w”, so the y of the velocity minus 10.
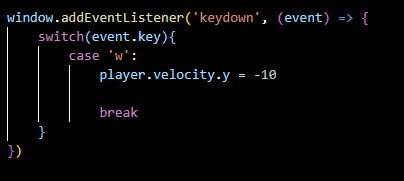
The player can jump now, but when you hold the “w” key, the player will be stuck in the screen game and will not go down. To fix that, we just need to move “this.sides.bottom” out of the if-else statement.

The problem is fixed.
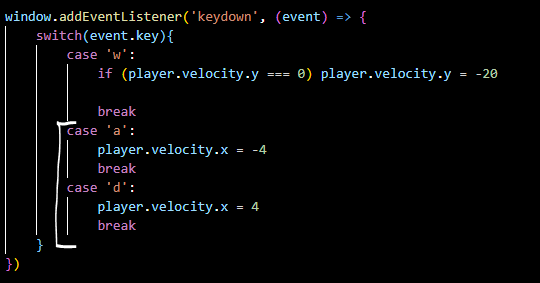
In the function that makes the player jump, check if the y of the velocity is 0, so the y of the velocity minus 20. That means the player can jump when it is on the ground.

Left And Right
In the keydown event, if keydown is “a”, the player’s velocity x minus 4, that means to the left. And if keydown is “d”, the player’s velocity x plus 4, that means to the right.
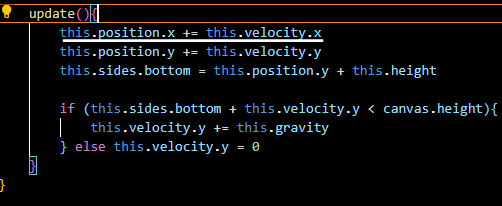
And add the player’s x coordinate with the x of the velocity. If the keydown is “a” it will add -4 to the player’s x coordinate and it also works with the “d” key.
After running the code, the player can move left and right. But its movement is not what it should be, it will move but not stop. As you can see it below.
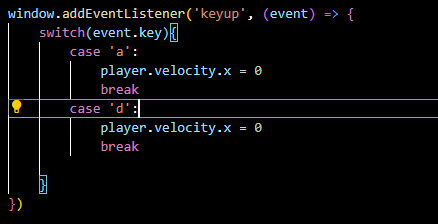
To fix this, just create an keyup event. That if the keyup is “a” or “d”, the x of the velocity is 0. This means that if we don’t press any key then the x of the velocity is 0 and the x coordinate of the player is plus 0, so the player won’t move.
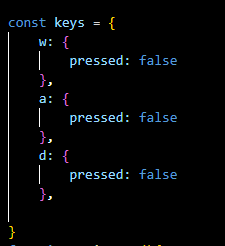
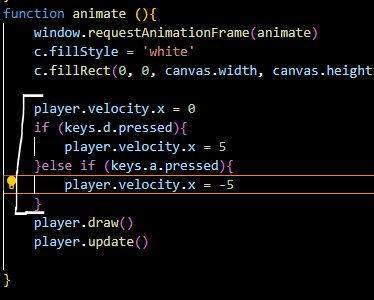
Now to make the code more organized. Create a group of 3 objects called keys, that all keys pressed are equal false. And in the animate() function, write an if-else statement to check if “d” key pressed is true, x of velocity is 5 and if “a” key pressed is true then x of velocity is -5.
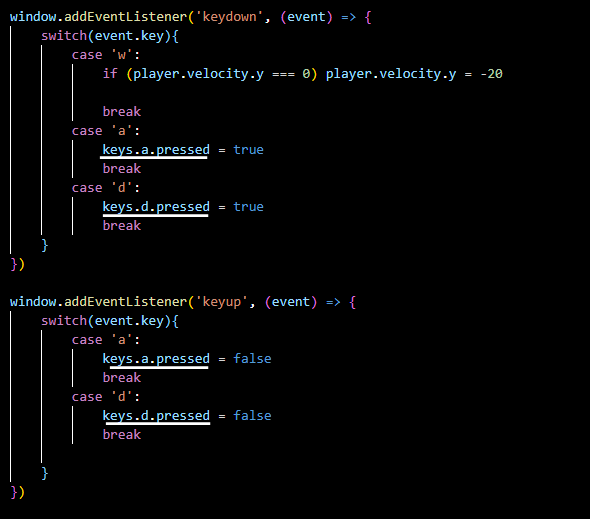
And in the keydown and keyup events, if keydown then the key pressed is true and if keyup then the key pressed is false.
Background
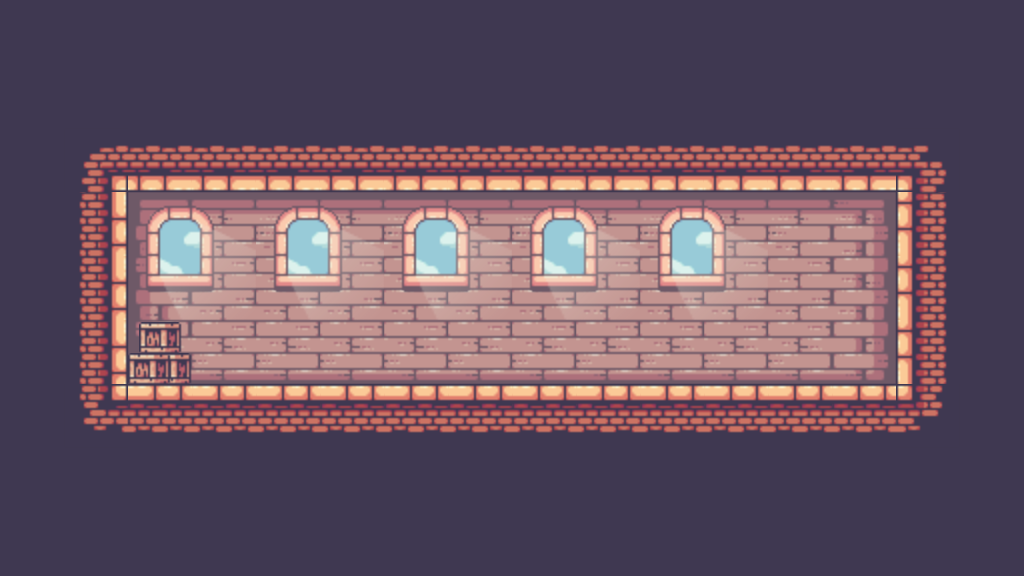
After running the code, it will work as it did at the start. To take the next step, I went to Chris’s course Github to download the images. And now we create a Sprite class and also use the constructor() method with the position argument. In this method, the position is equal to the position, the image equals new Image(), and the source of the image is “./img/backgroundLevel1.png”. And also create a draw() function in the Sprite class. It will take the background level 1 and draw it into the screen game.


Call this class with x and y arguments equal to 0. And call the draw() function to draw the background image in the animate() function.


After running the code, you will have screen game have a background like below.
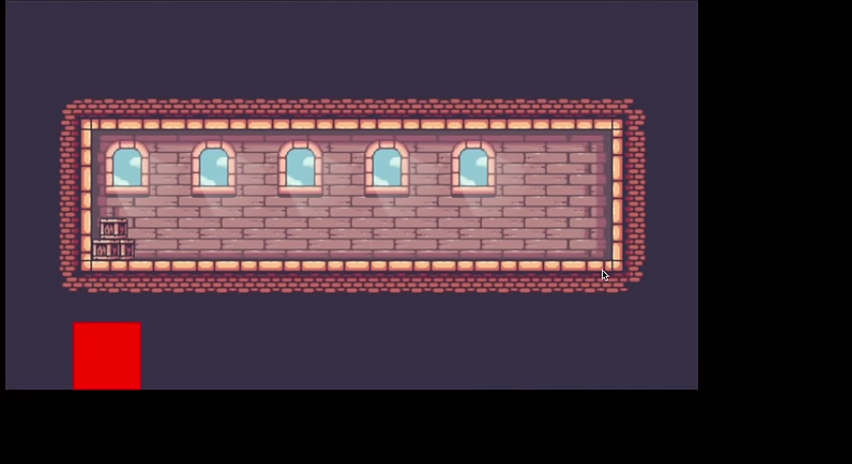
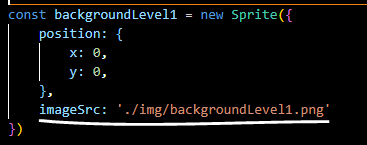
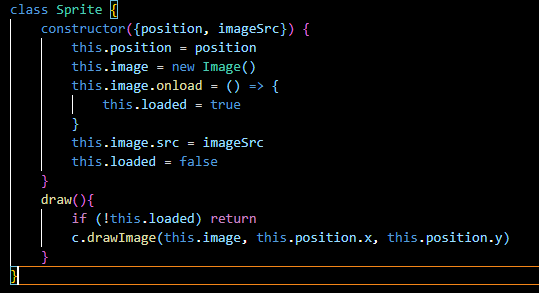
Move the image source in the constructor() method to the background level 1() function. And in the constructor() method, the image.src is equal imageSrc, the loaded is false, and create onload function of the image, inside that loaded is true. And in the draw() function, write another if-else function check if it is not loaded so it will draw the image background level 1.

Collisions Blocks
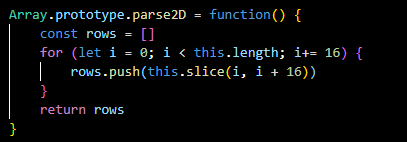
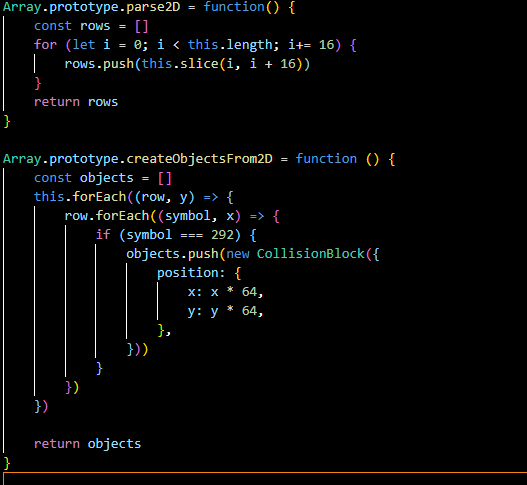
Next is make the collisions blocks for the background level 1. First create an array called collisionsLevel1, then create a function called parsed2D and the array.prototype for this function. The array.prototype allows you to add new properties and methods to arrays. Inside this function, make the row equal to an empty array. And use a for loop to iterate over the collisionsLevel1, it will take the 16 elements and form a new array, then take the next 16 elements to create the second array and repeat until it loop over the collision arrayLevel1, then add all the new array elements to the row array.

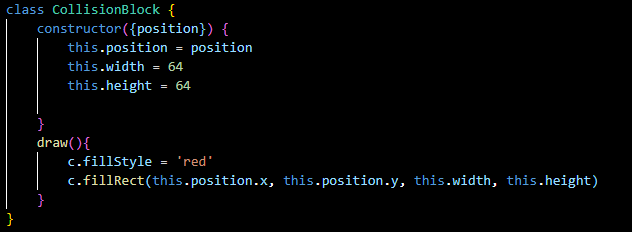
Create a class called CollisionBlock, also use the constructor() method with the position argument. In this method(), the position is equal position, the width and the height is 64. And also create a draw() function, it will draw the red box.
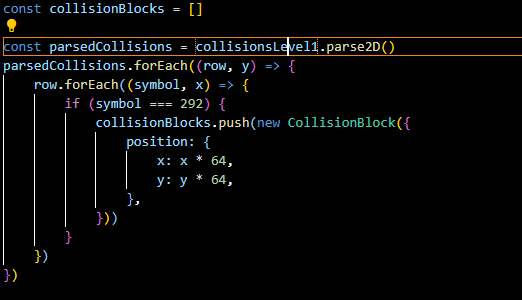
Next make the collisionBlocks is an empty array, and the parsedCollisions is equal collisionsLevel1.parsed2D. We use forEach() for the next step, forEach() is similar to Python enumeration. In forEach(), the first parameter is the value of the element, the second parameter is the index of the element. For each row of the parsedCollisions, and for each element in a row, check if element equal 292, call CollisionBlock with the position argument, position x is x times 64, x is the index of each row and position y is y times 64, y is the index of the element in a row. And add all this information to the collisionBlocks array. Then, in the animate() function, use forEach() to draw every collisionBlock.
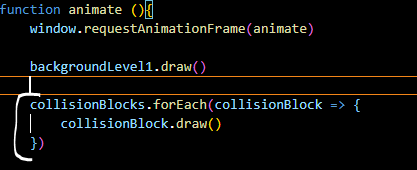
After you run the code, you will have all red boxes drawn around the map game.
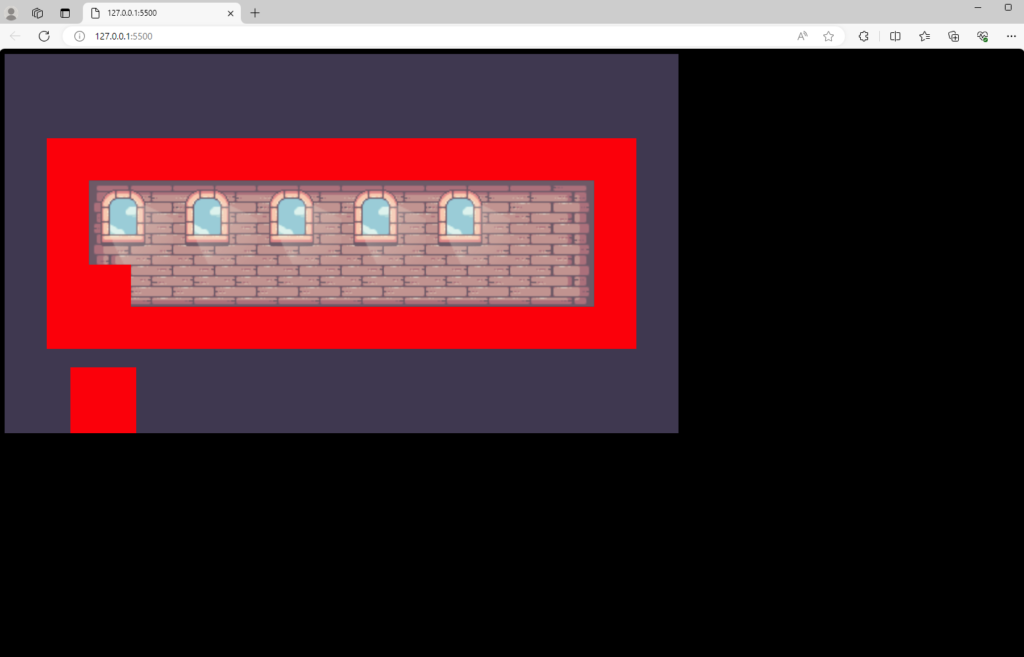
To easily see all the blocks of the game. In the draw() function of the CollisionBlock class, change the color of the box to “rgba(255, 0, 0, 0.5)” . You will have clear color of the boxes as below.

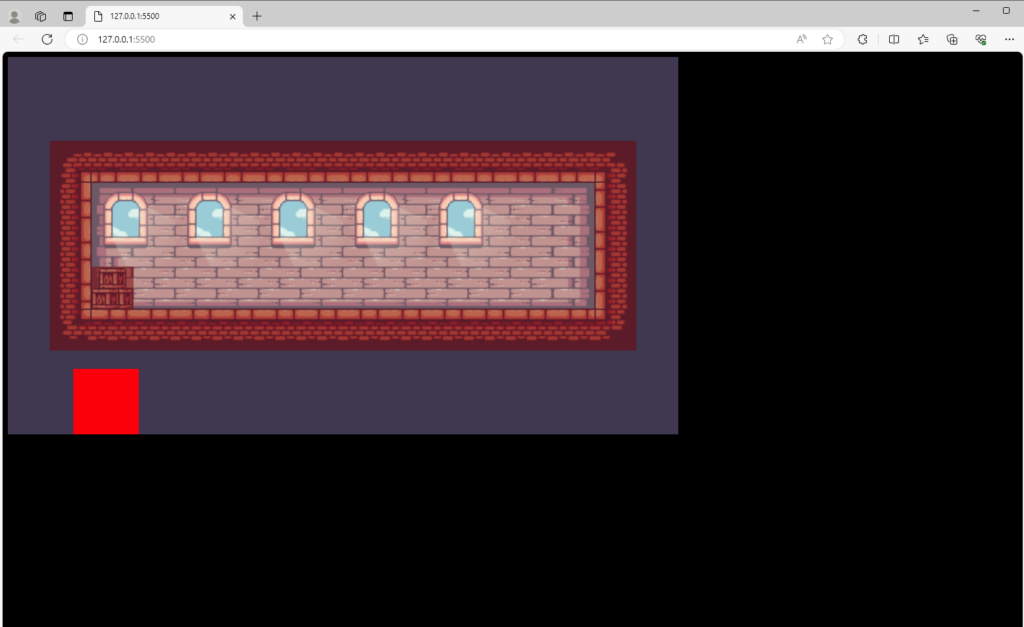
Create a new file called “utils.js”, and move the parsed2D and the parsedCollisions function into this file. And change the name of the parsedCollisions to createObjecFrom2D, and call this function in the “index.js” file. Once you run the code, it should work properly.

Collision Detection
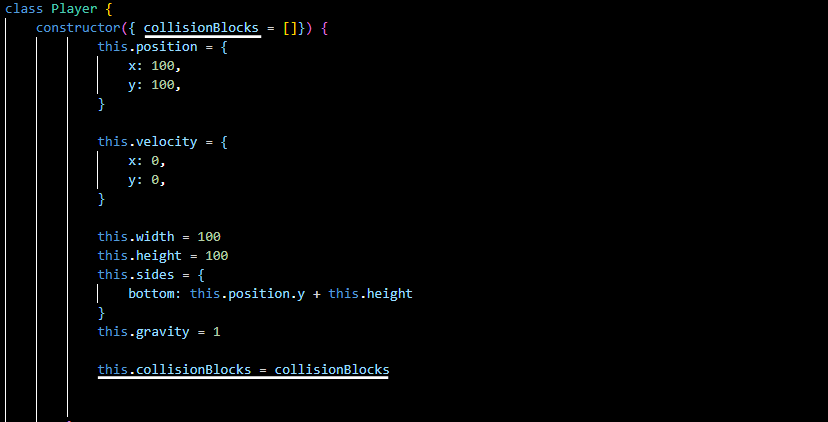
In the “Player.js” file, add an empty object called collisionBlocks, and to ensure this object exists, I assign a new property called this.collisionBlocks equal collisionBlocks.
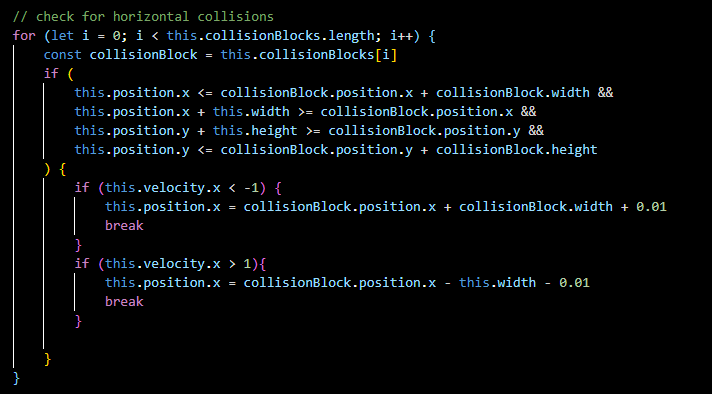
In the update() function, I wrote an if-else statement to check if the player collides with blocks or not. This statement will check if the player’s left coordinate is less than the block’s right coordinate, and if the player’s right coordinate is greater than the block’s left coordinate, and if the player’s bottom coordinate is greater than the block’s top coordinate, and if the block’s top coordinate is less than the block’s bottom coordinate, then the player has collided with the blocks.
And if the player goes left, meaning the player’s velocity is negative and it collides with the blocks, then the player’s x coordinate is equal to the block’s right coordinate plus 0.01. And if the player goes to the right, meaning the player’s velocity is positive and collides with the blocks, the player’s x coordinate is equal to the block’s x coordinate minus the player’s width and minus 0.01.
And in the “index.js”, add the collisionBlocks when the Player class is called.

Once you run the code, the game has a collision on the horizontal x-axis. You can see how it work below.
But to make it not have any mistake, change the if-else statement that if the player goes left or right, change the velocity to be less than 0 for the left and greater than 0 for the right.
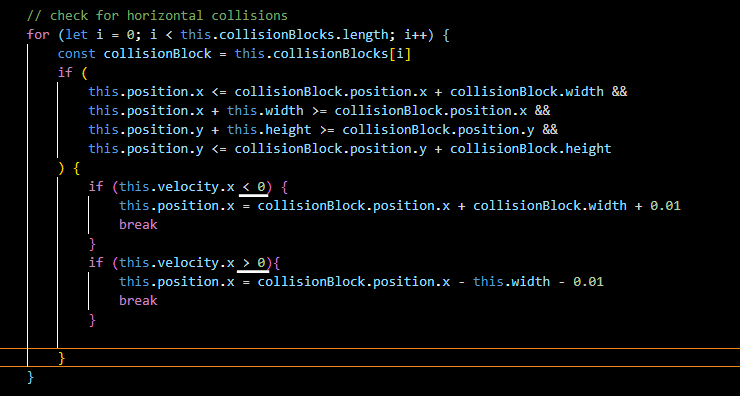
Next is to create the vertical collisions, just copy the horizontal collisions function, and not change anything in the if-else statement that check does the player collide with blocks. Add the velocity is 0 when the player goes to the left and the right. And also change the x to the y.
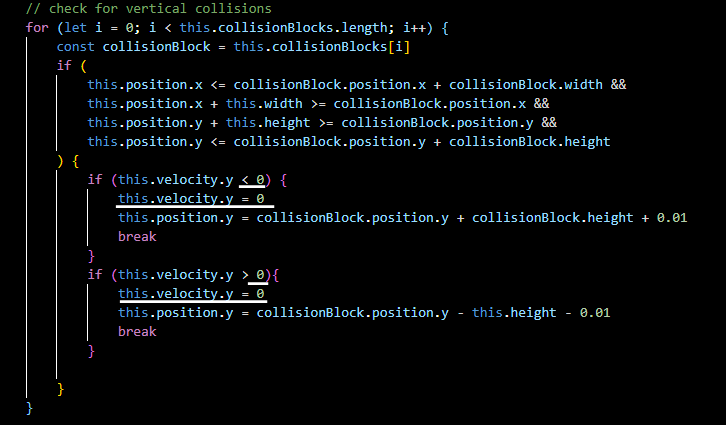
The vertical collisions is work.
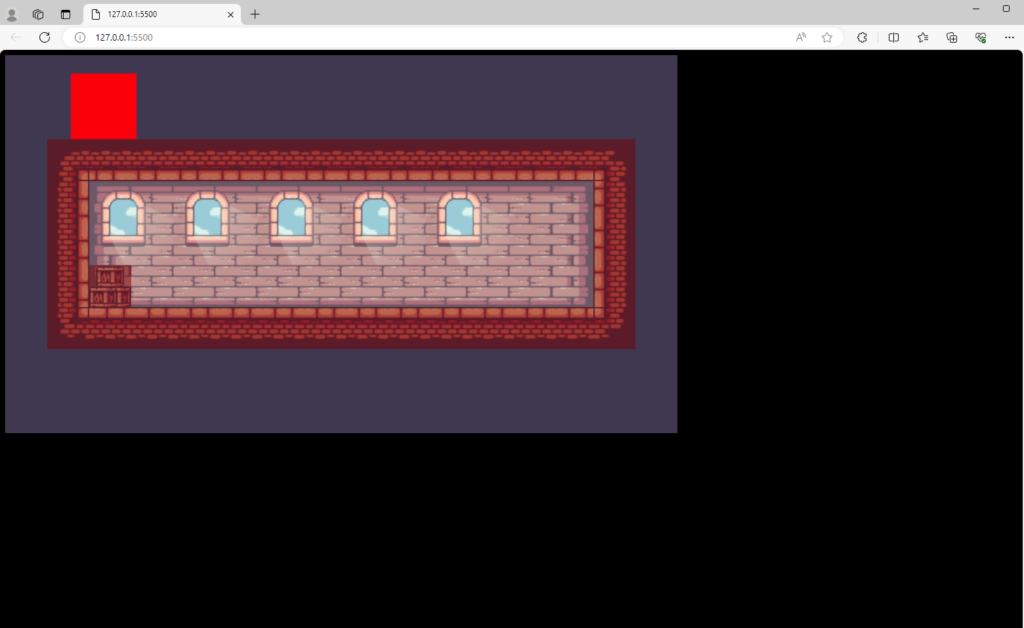
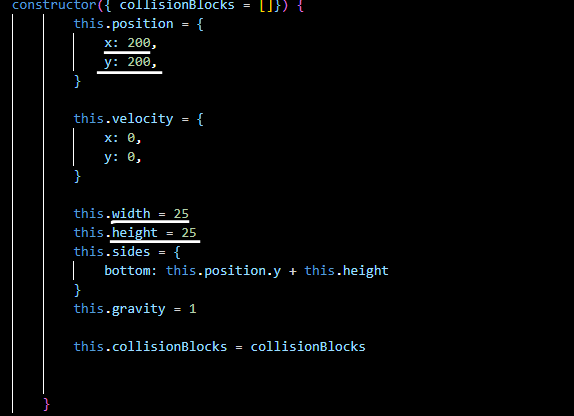
To make the player look more reasonable, change the player’s position to (200,200) and its size to 25×25.
As you can see above, players can move within the game map but cannot jump. To fix this problem, move the y of velocity plus gravity to the top.
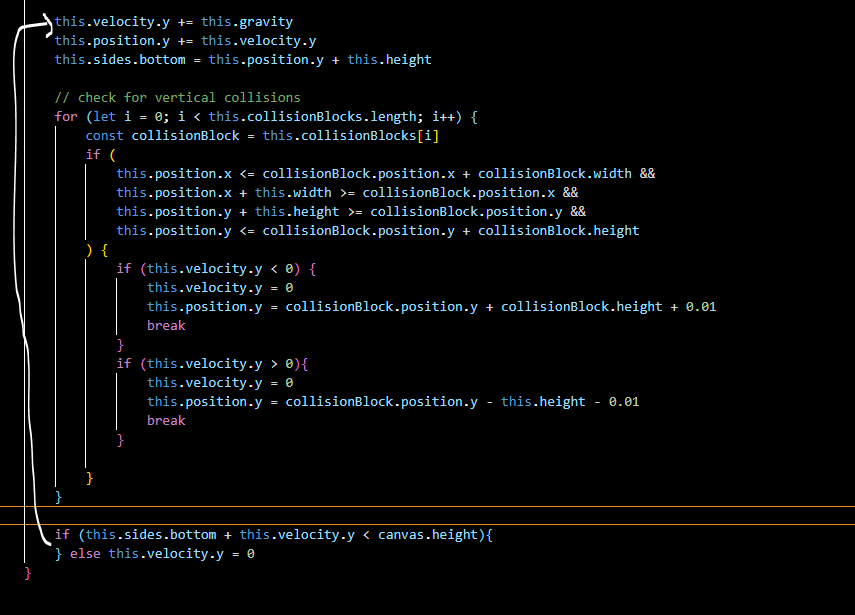
Delete the side.bottom and the if-else statement I made earlier to make it drop down.
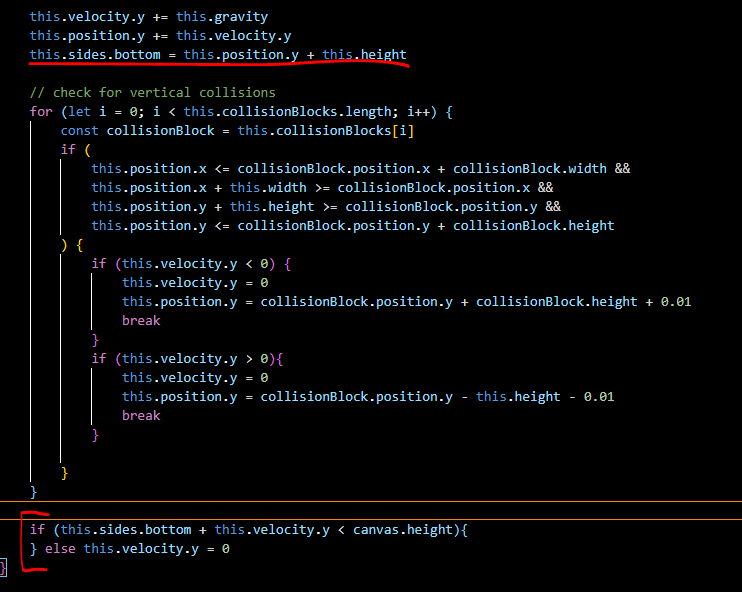
You code should now look like this:
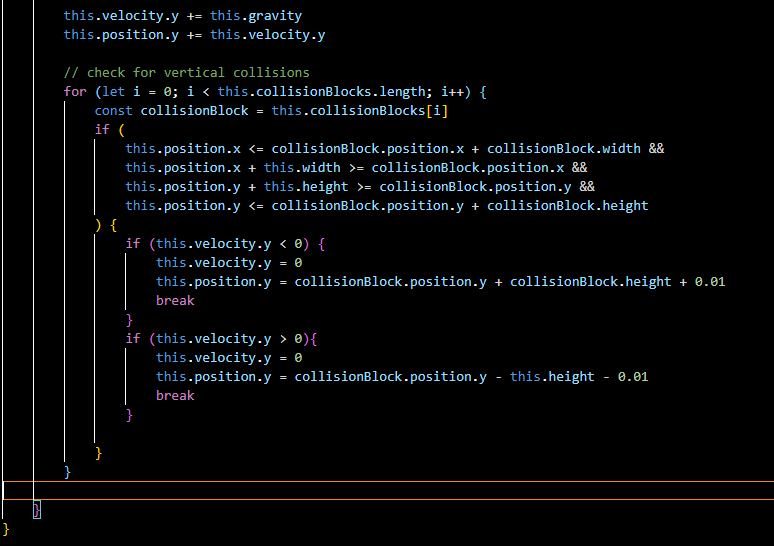
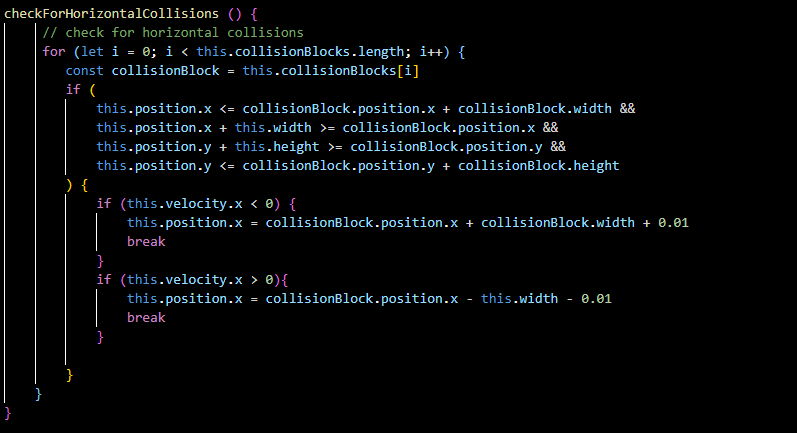
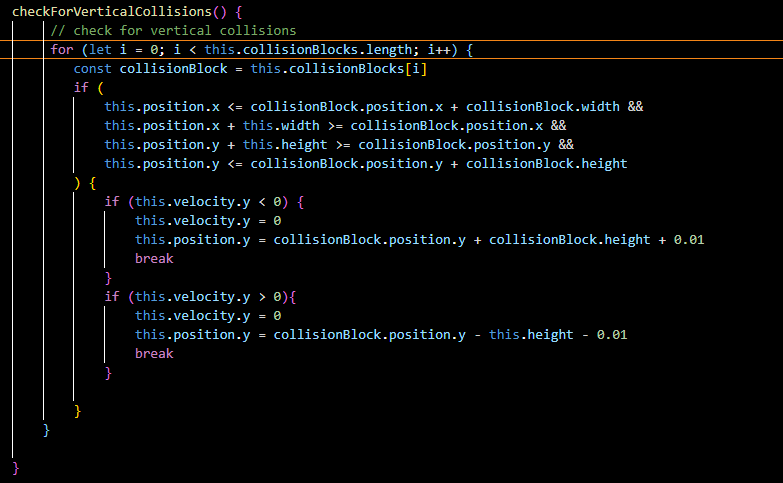
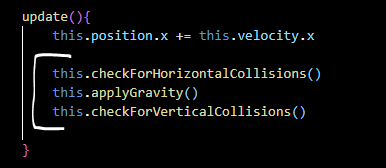
To easily organize my code, create 3 functions and call them in the update() function. Create a function called checkForHorizontalCollisions() and move all the code that checks the horizontal collisions into this function. Do the same thing with the vertical collisions, move the code that checks the vertical collisions into the checkForVerticalCollisions() function. And also create a applyGravity() function, and move the code that makes the player’s gravity into this function.

Sprite Animation
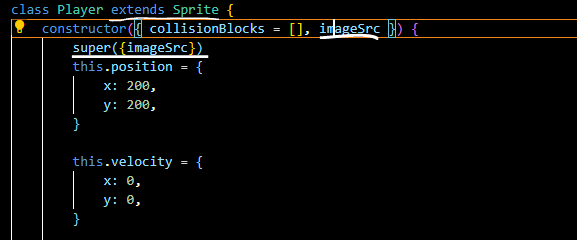
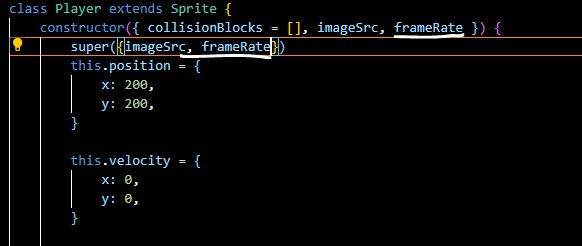
First is delete the draw() function in the Player class. Because I want to use the draw() function of the Sprite class. To can use the properties of the Sprite class, I need to use the extend() and super() methods to use the properties of the Sprite class. The extend() method is used in class declarations or class expressions to create a class that is a child of another class. And the super() method is call the constructor of its parent class to access the parent’s properties and methods. Go to the “Player.js” file, add an argument in the Player’s constructor is imageSrc. And extend() the Sprite class in the Player class and use the super() method to call the properties of the Sprite class.
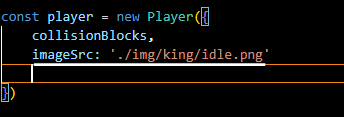
In the “index.js” file, call the Player class with 2 arguments: collisionBlocks and imageSrc. Write the imageSrc equals “./img/king/idle.png”.
Go back to the “Player.js”, use the fillStyle() and fillRect() methods to draw the blue box which is the player.
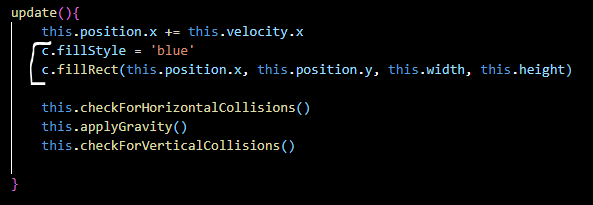
Once you run the code, the player image is on the screen.
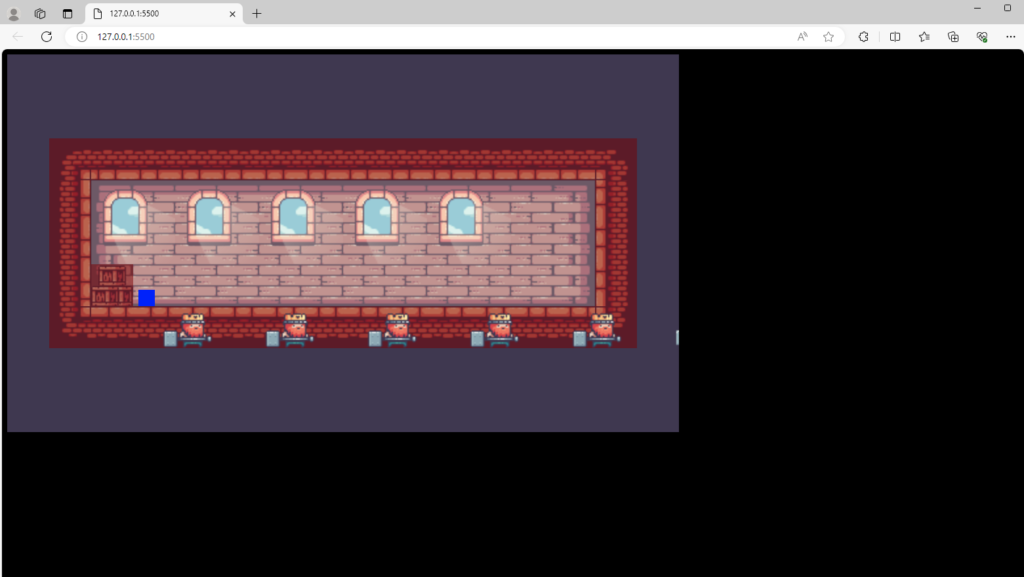
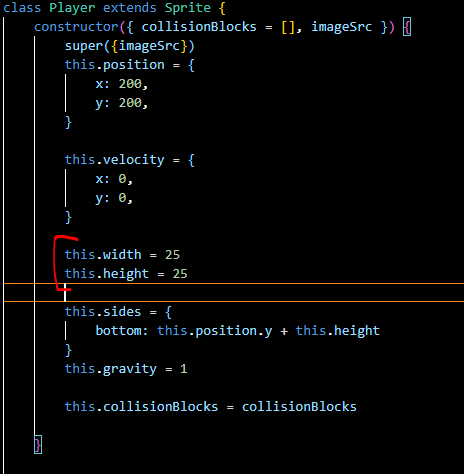
As you can see above, the blue box and the player image are not in the same position. So we need to make the blue box that has the same size as the player image. In the Player’s constructor, delete the width and the height.
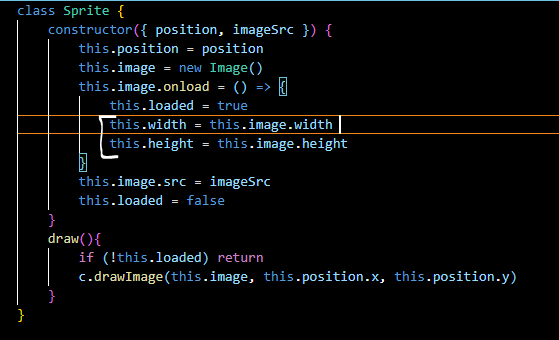
Then in the Sprite class, make the width and height of the blue box equal to the width and height of the image.
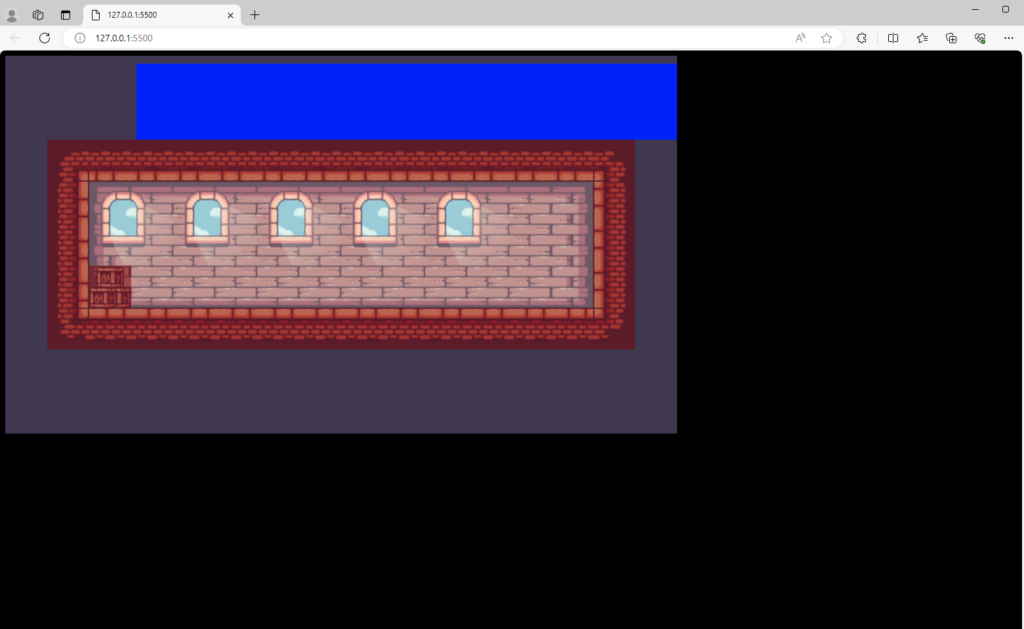
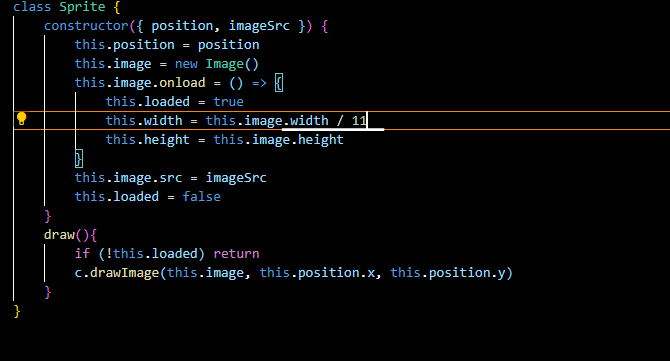
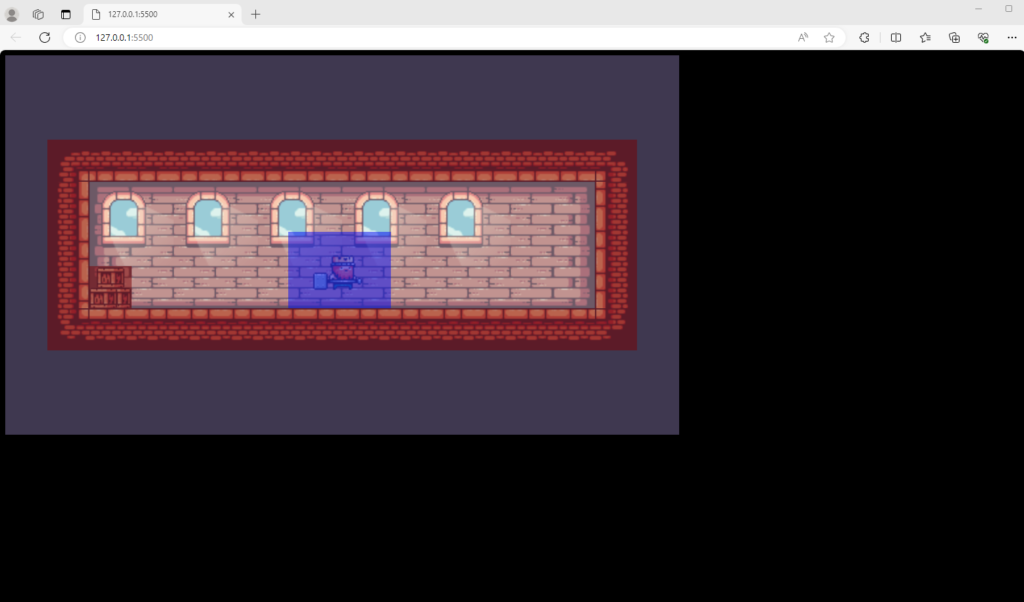
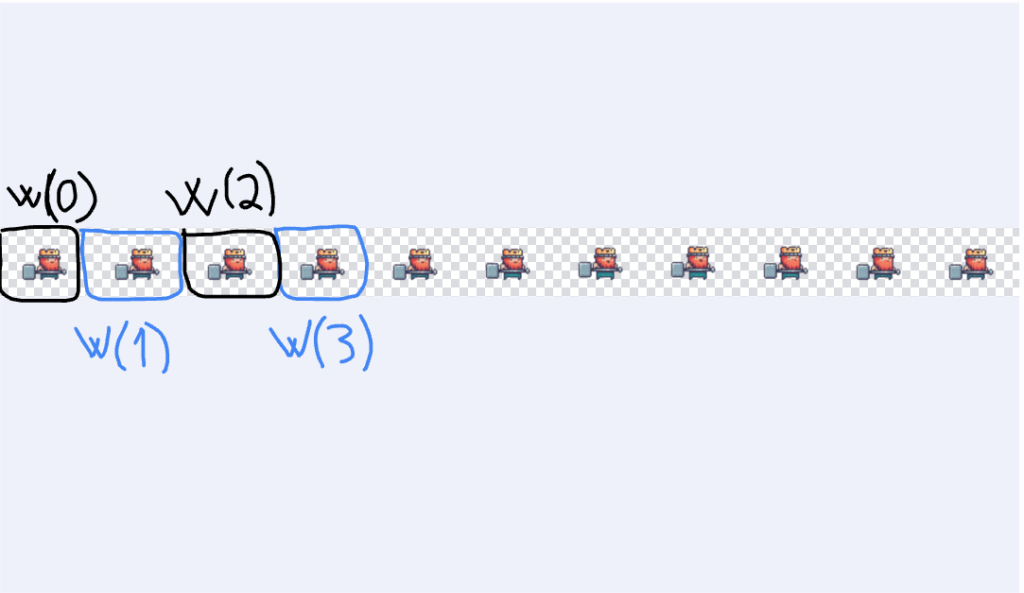
Now the blue box and the player image are in the same position. But we want inside the blue box to have only one player image, not all images. So in the player image there are a total of 11 small images, we just need to take the width of the blue box equal to the width of the image divided by 11.
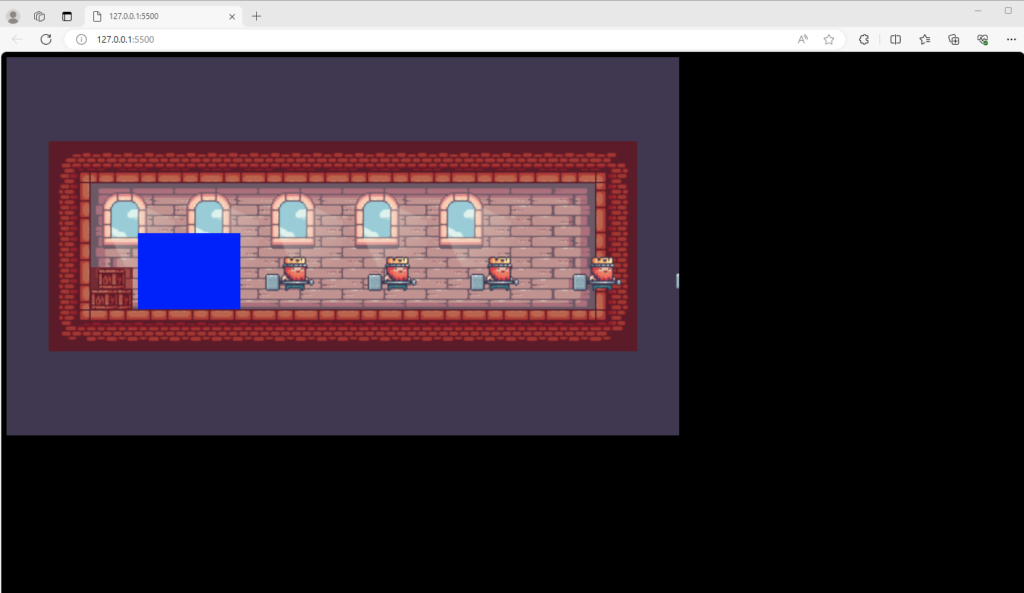
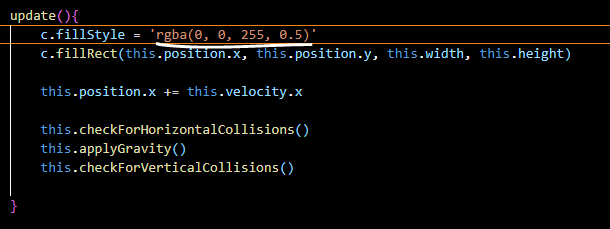
To see the player inside the blue box, change the color of the blue box to “rgba(0, 0, 255, 0.5)”.
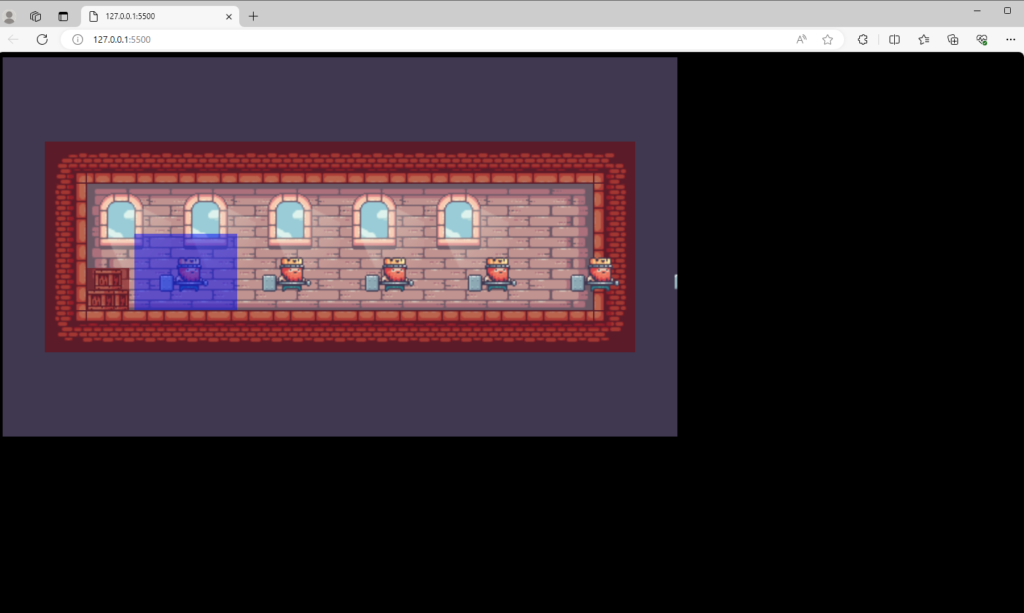
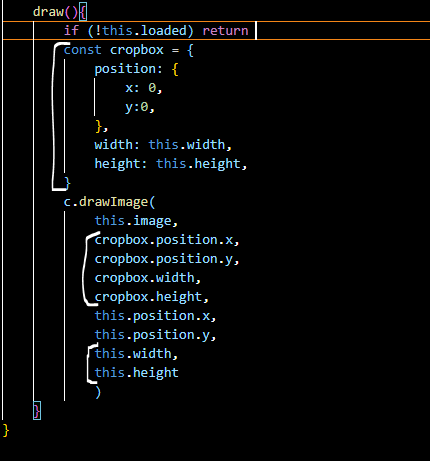
We need to crop the player image to get one player on the screen. In the draw() function of the Sprite class, create a cropbox constructor. The position is 0 and the width and height are equal to the width and height of the blue box. And add them to the drawImage() function, add the cropbox.x, cropbox.y, cropbox.width, cropbox.height in the second to fourth argument. And also add the width and the height of the blue box in the last two arguments. It will crop the image of the player image at (0,0) with the size same with the blue box, and draw them at the blue box position with the blue box size.
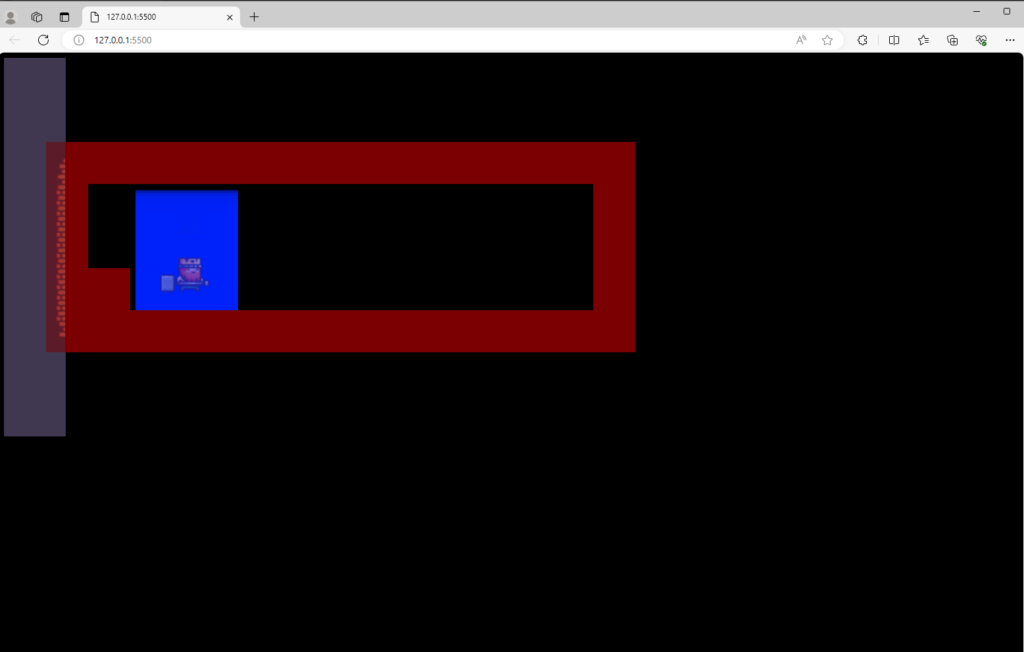
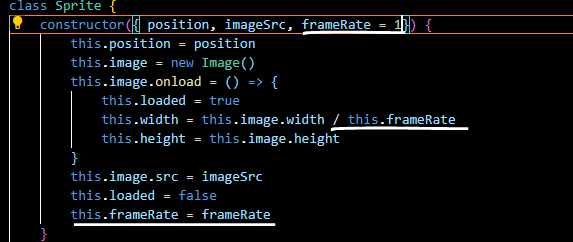
As the imageSrc, we add the frameRate argument to the Player class and Sprite class. And make the width of the blue box equal to the width of the player image divided by frameRate. Also add this argument in the super() method. Then in the “index.js”, write the frameRate equal 11 when we call the Player class.

Now make the animation of the player when it is standing. In the Sprite class, create new object called currentFrame is 0. Create a function called updateFrame(), it will check if the currentFrame is less than the frameRate minus 1 , so add 1 to the currentFrame. And if it is greater than the frameRate, make the currentFrame equal 0. And call updateFrame() function in the draw() function, then make the x of the cropbox equal to the width of the blue box times the currentFrame.
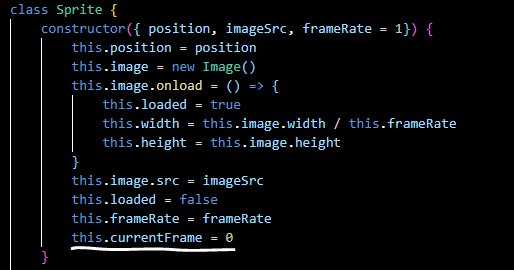

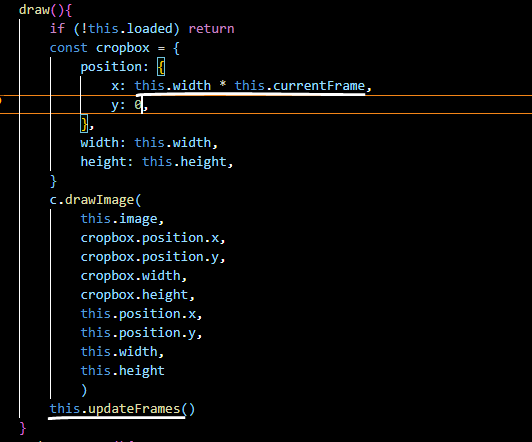
This is how the animation works. Because the width of the blue box is equal to 1 part of the image. So if the width of the blue box multiplies by 1, it will move to the second image and updateFrame() will check if the animation goes over the image or not. If not, currentFrame adds 1. Now the width of the blue box times 2, the image is the third image. And it will run until the animation runs over the image, then set CurrentFrame to 0. And our animation will loop over and over again.
The animation of the player is work.
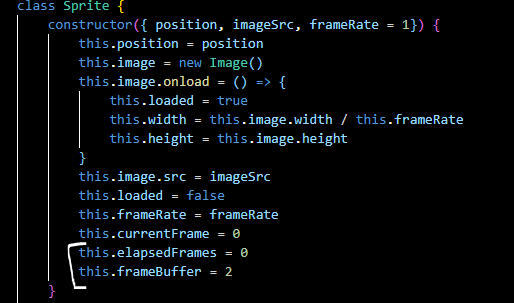
But as you can see, the animation is too fast. To make it slower, in the Sprite’s constructor add a elapsedFrames is 0 and frameBuffer is 2. And in the updateFrame() function, make the elapsedFrame add 1, and check if the elapsedFrame divided by the frameBuffer and its remainder is 0, continue to go to the next image.

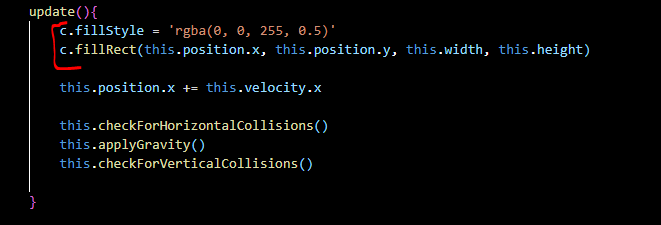
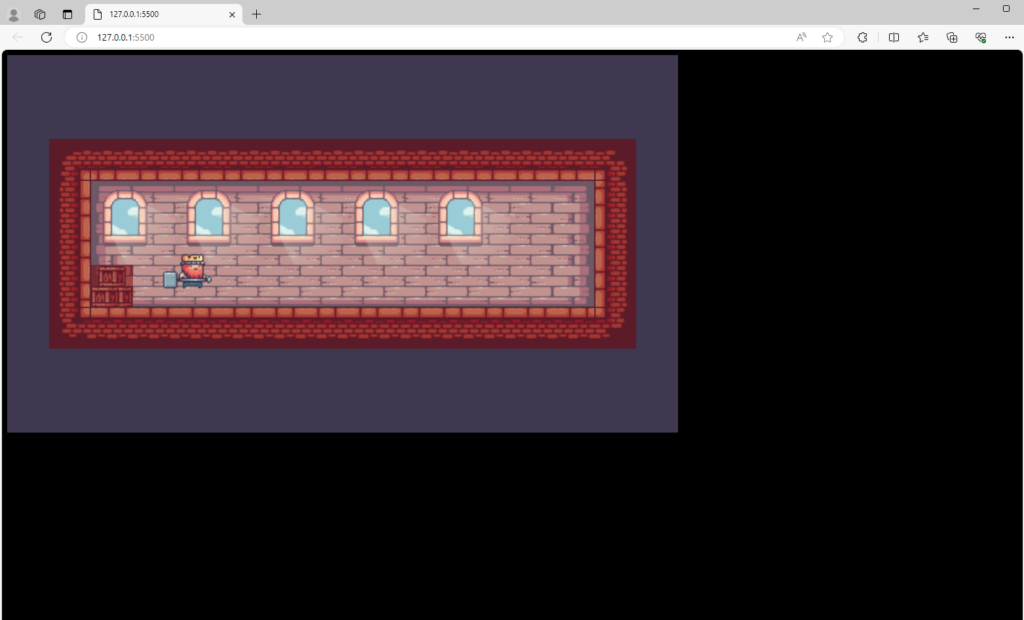
Now we can delete the blue box in the update() function of the Player class.
Hitbox implementation
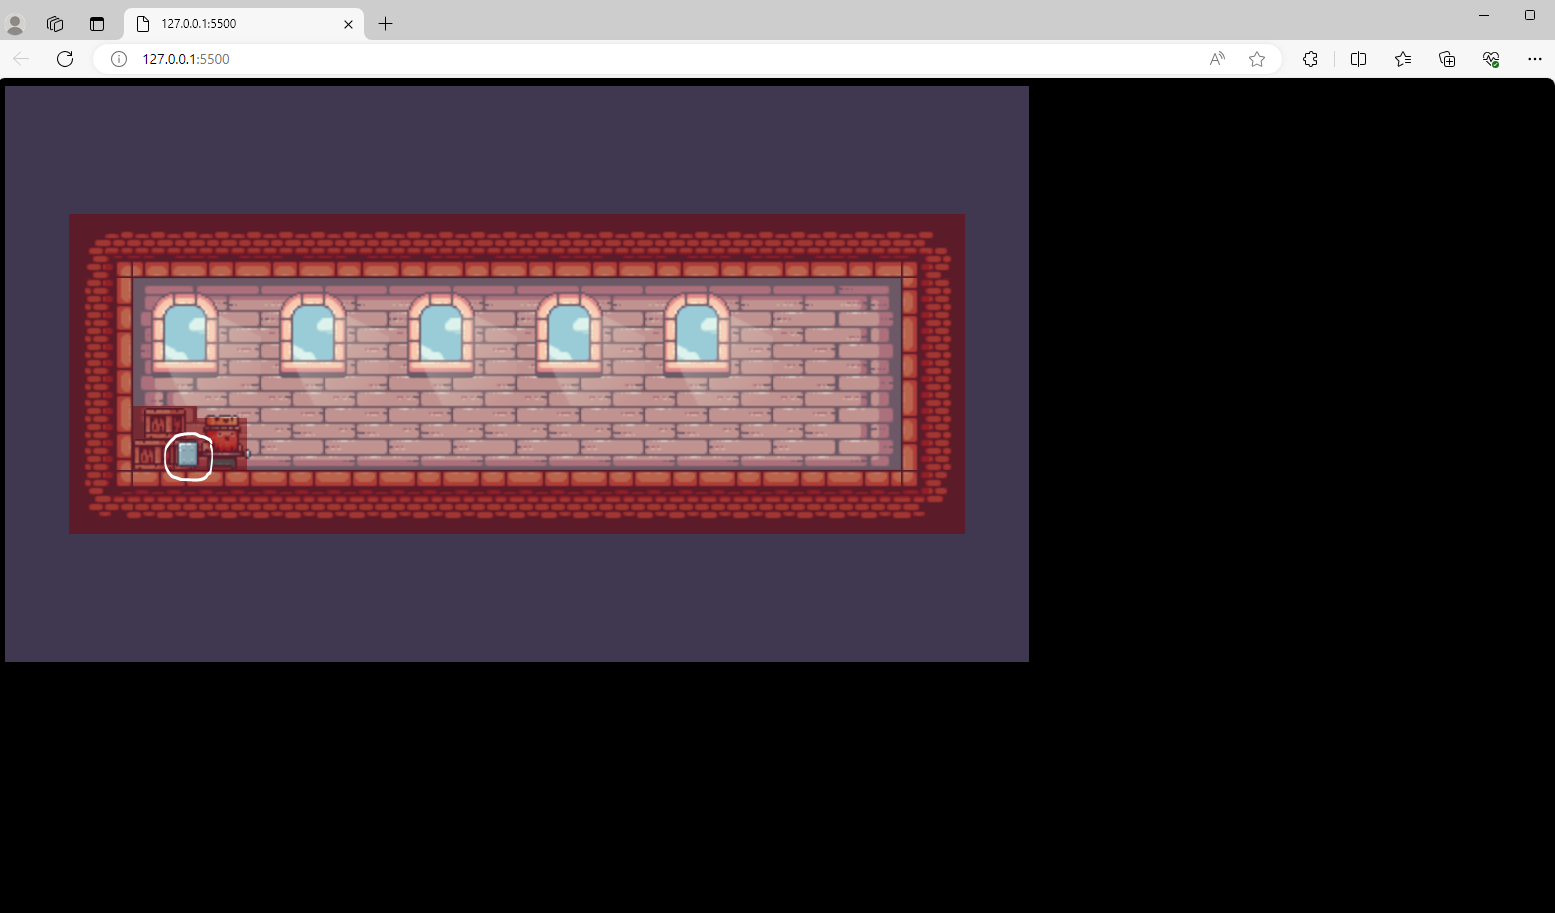
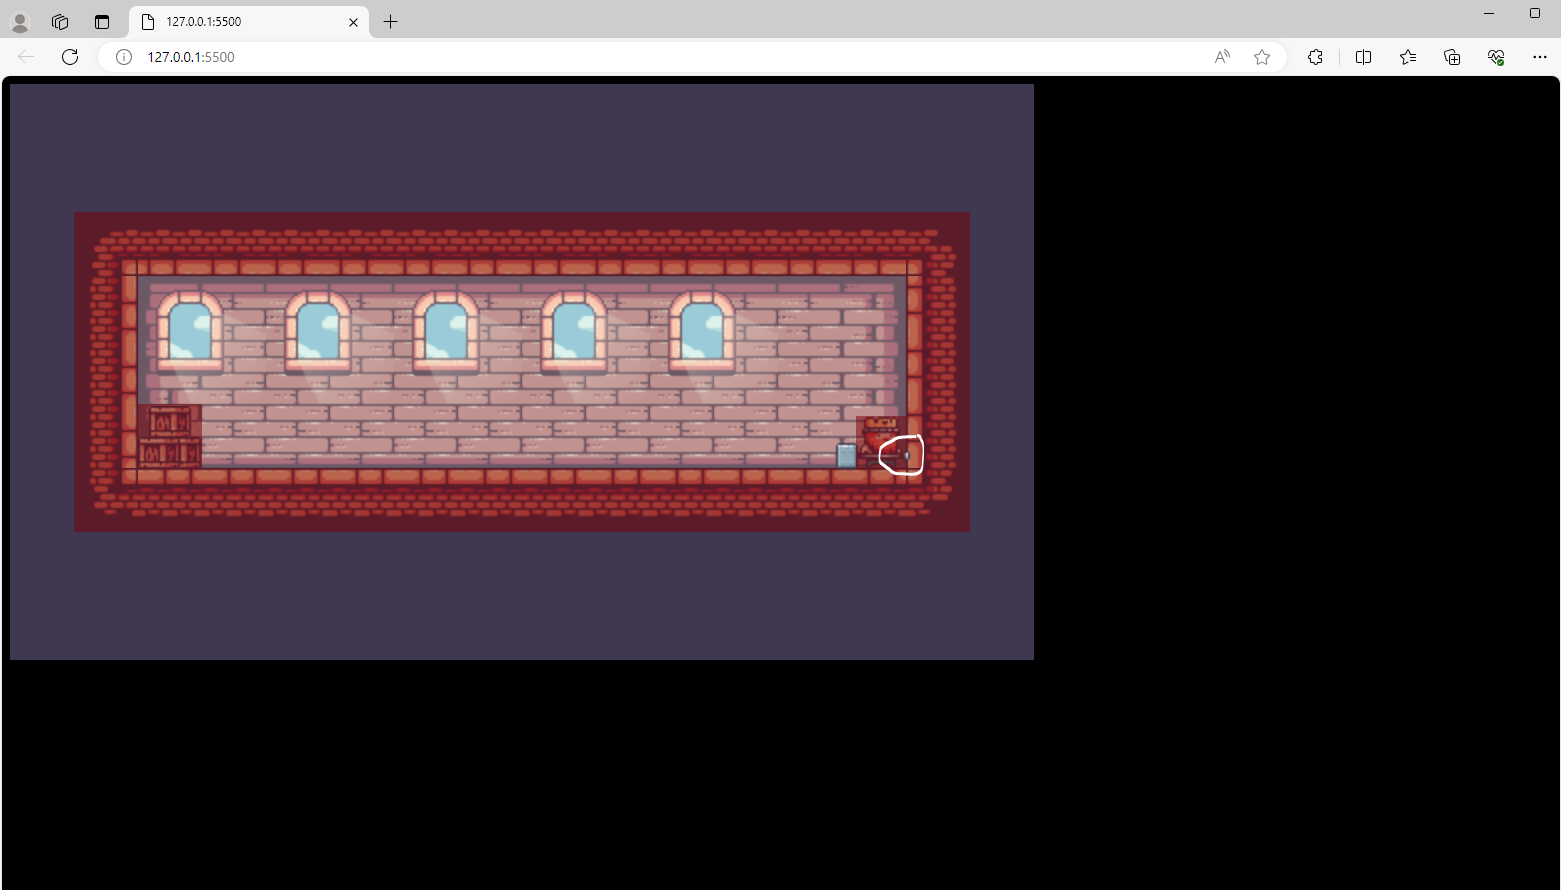
Now to easily catch the player’s position we need to draw a red box at the player’s position. Because when we crop the image of the player it also crops the space around it. Let’s imagine there is a big square and the player are in the middle of the square. So divide the square to 9 small squares, the player is at the fifth square. Each square has a size 50×50, and to get the x of the player, just add 50 to the x of the box square. And do the same thing with the y, add 50 to the y of the big square. And just draw the square at that x, y with the size is 50×50.
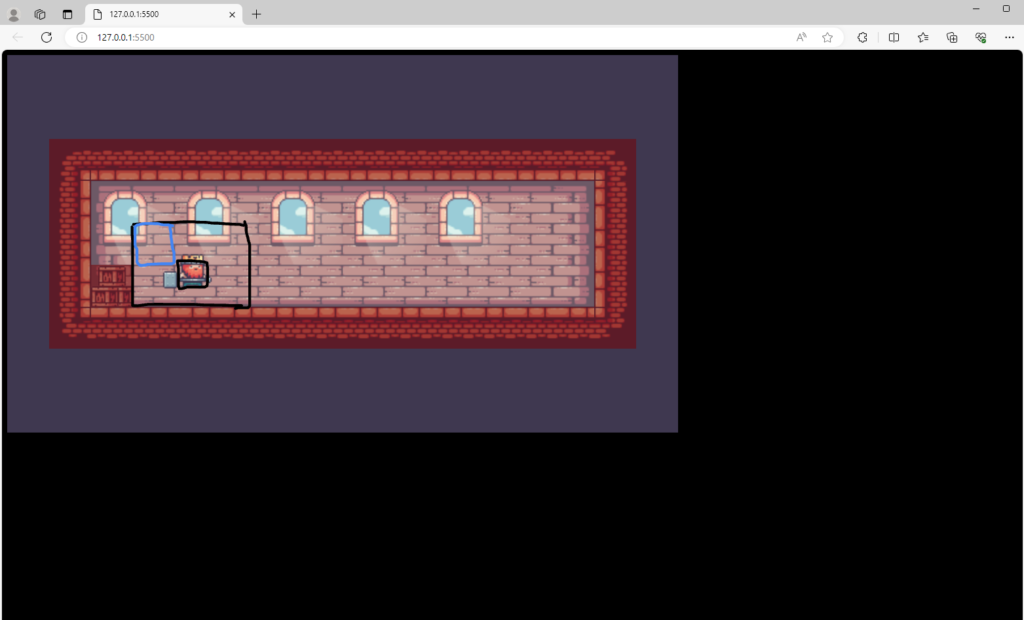
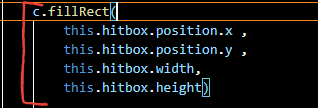
First create an object called hitbox, its x is equal to the big square x and its y is equal to the big square y, and its width and height is 50. Then draw a square with hitbox x, y and its width and height.
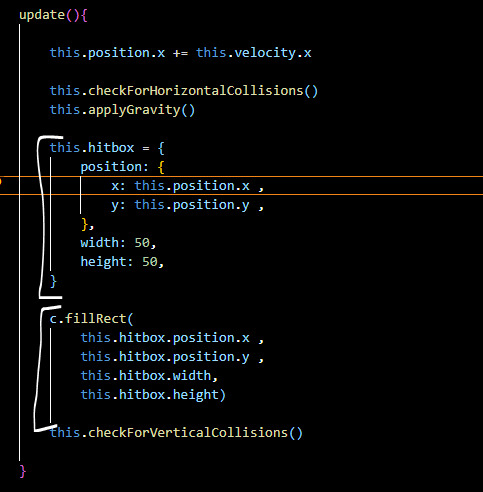
The red box at the first square.
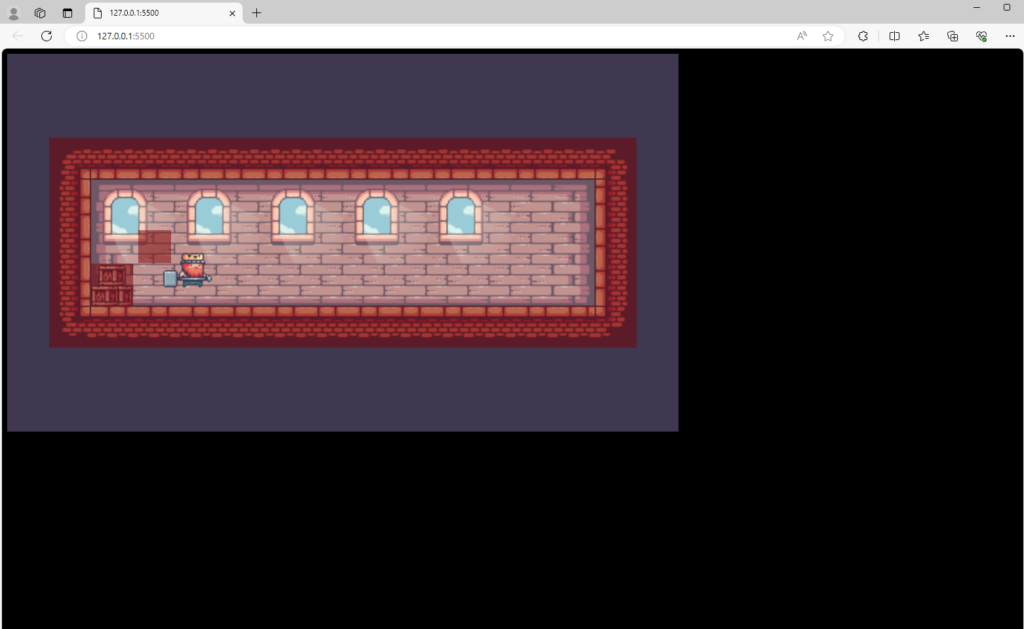
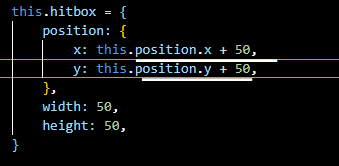
Next is just add 50 on x and y.
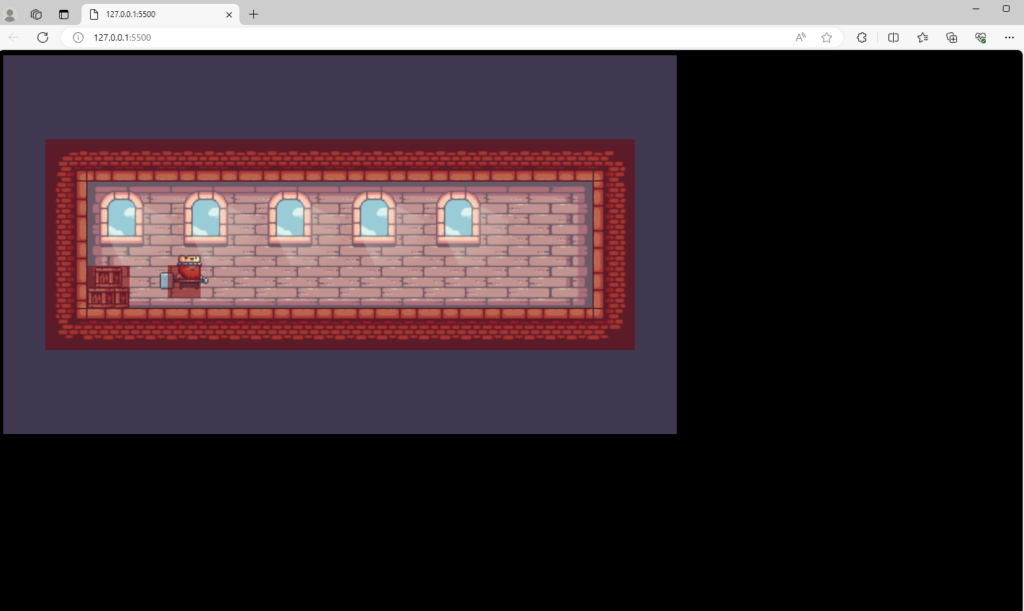
Almost there, we just need to change the position and size so that the red box has the same size and position as the player.
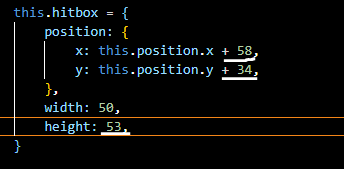
The red box has the same size and position as the player.
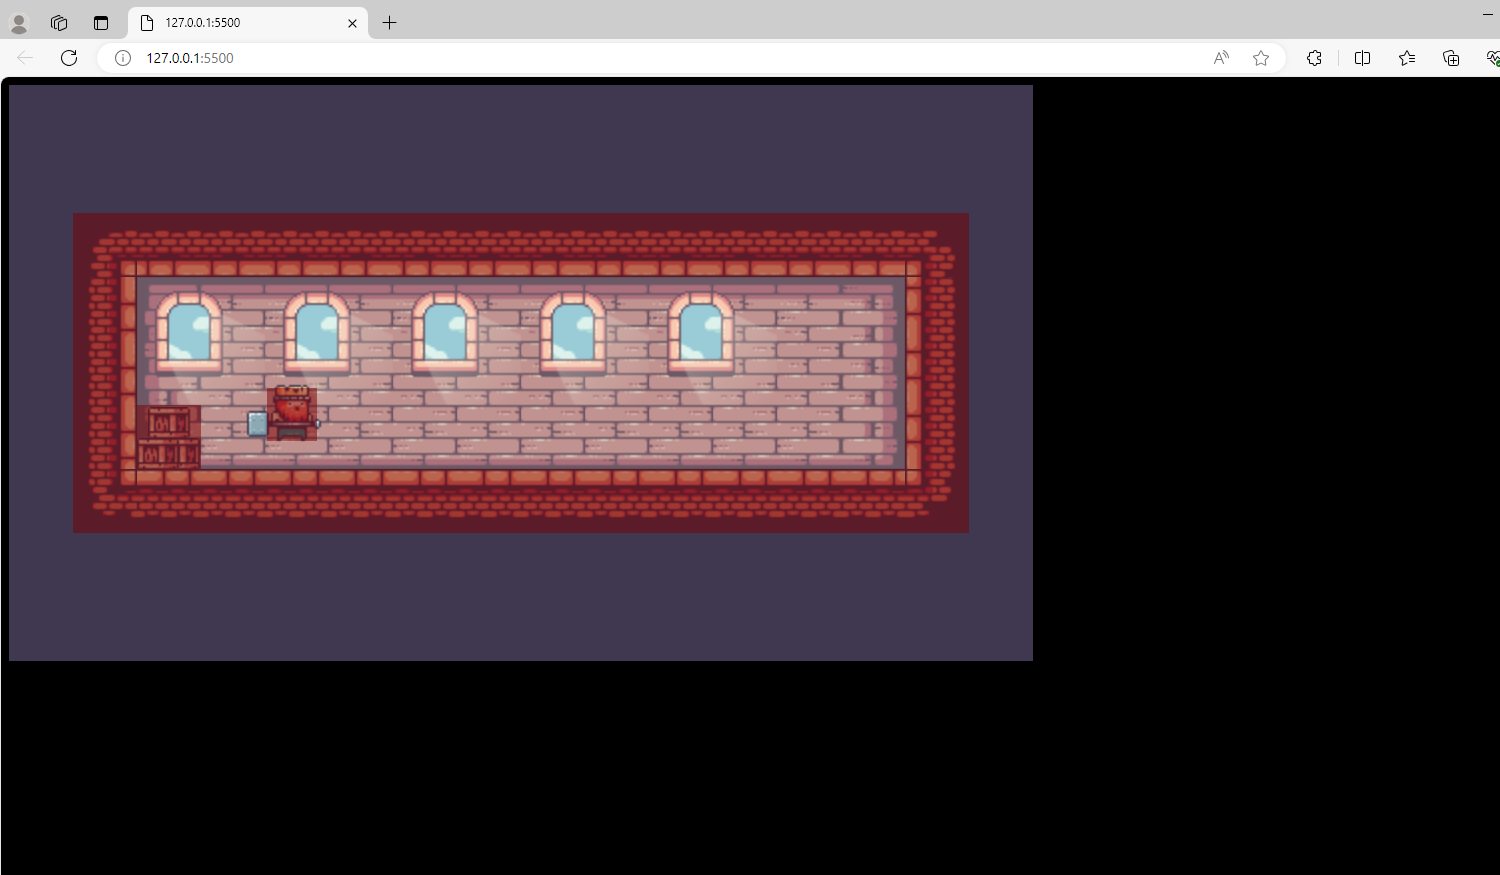
Because our player’s position is now the position of the hitbox. So in the checkForVerticalCollisions() function, change the initial position to the position of the hitbox.
From this:

To this:

Next is making the player able to stand on the ground, create an offset variable equal to the y of the hitbox minus the y of the big square and add it to the height of the hitbox. And the y of the big square is equal to the y of the collisionBlocks minus the offset and minus 0.01. Then we get the y of the big box.

This is how to find the offset.
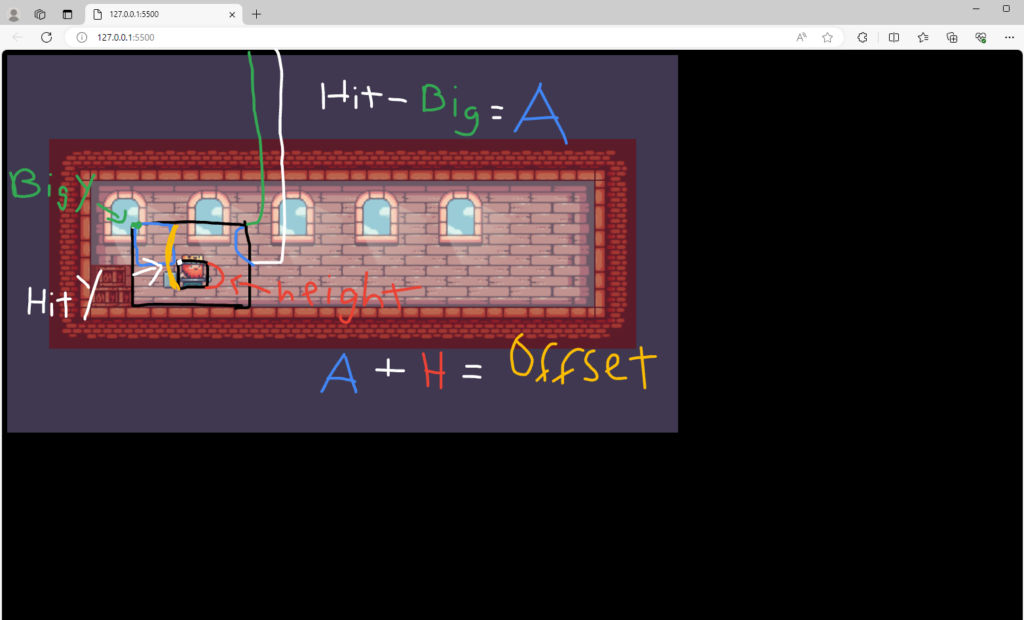
And here’s how to find the y of the big box that makes the player stand on the ground.
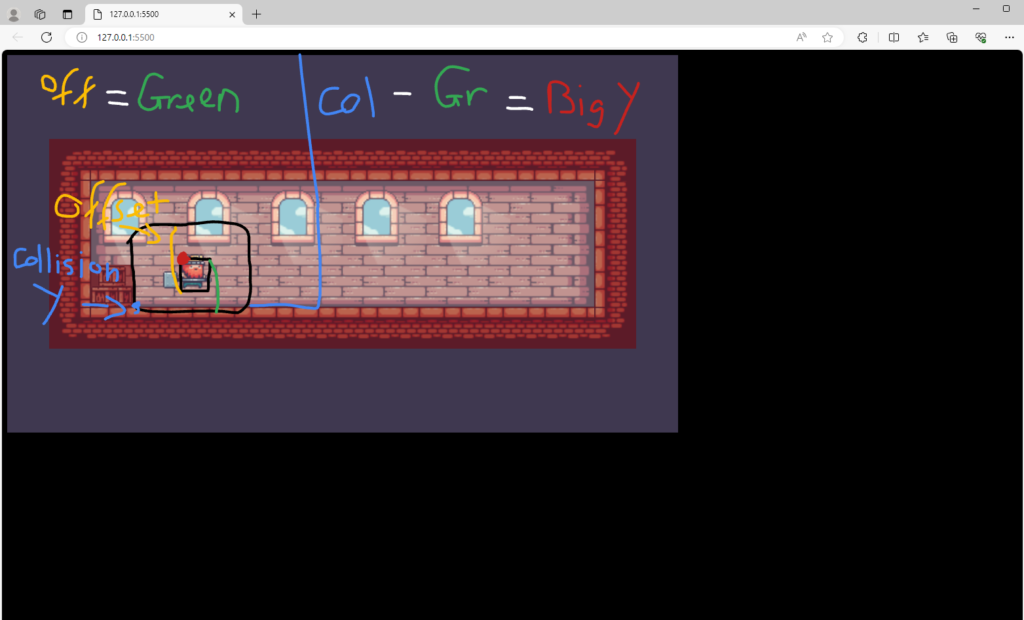
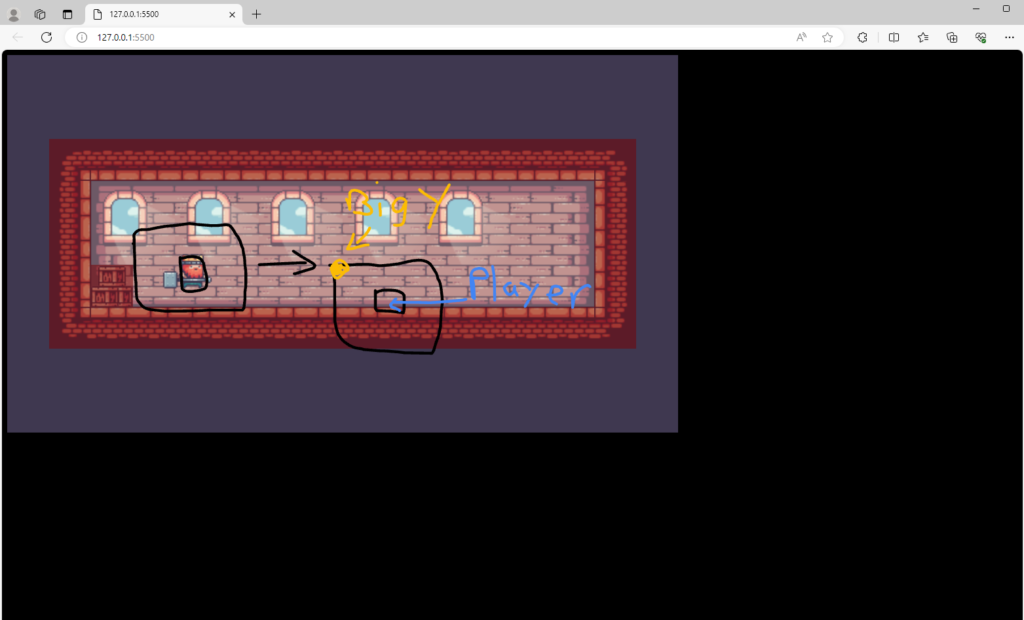
The player stands on the ground.
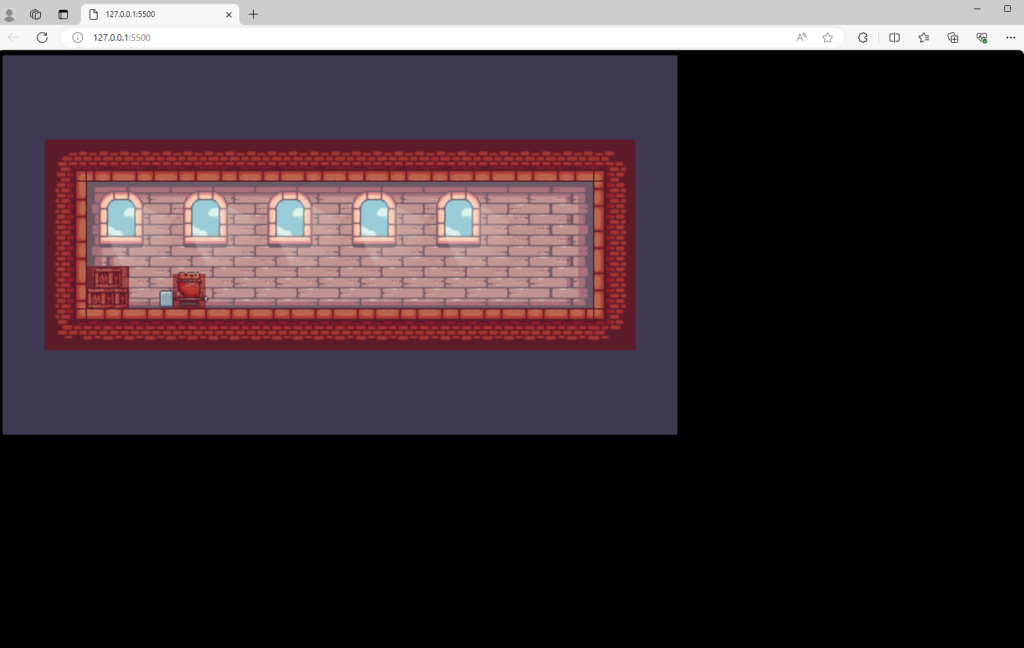
Same as how to make the player stand on the ground, we make the player’s head to touch the bottom of the collision block at the top. Create an offset variable equal to the y of the hitbox minus the y of the big square. Then the y of the large square is equal to the y of the collisionBlock plus the height of the collisionBlock and minus the offset by 0.01.

This is how to find the offset.
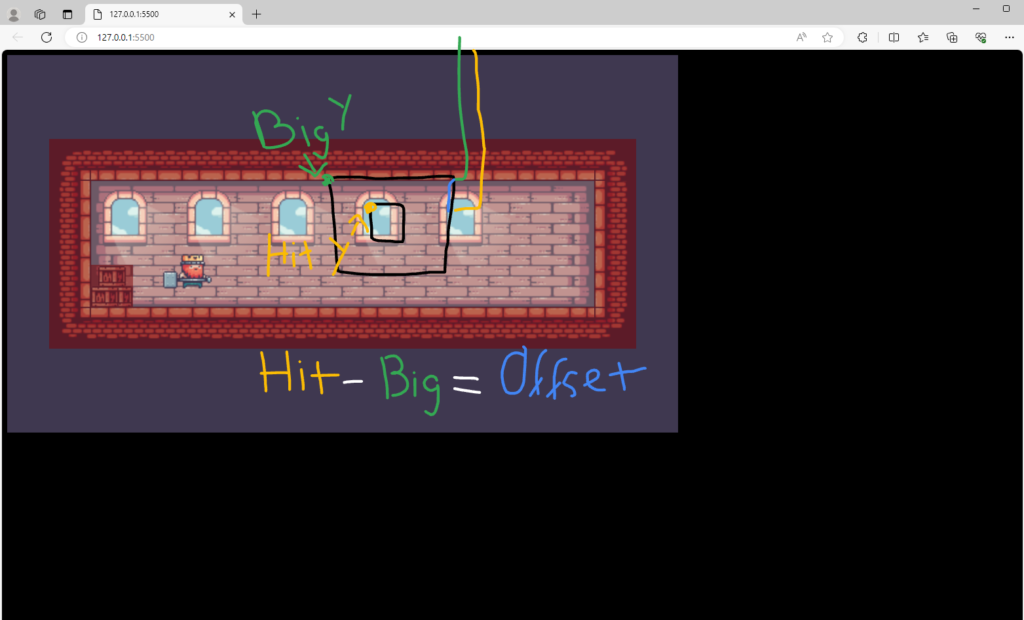
This is how to find the y of the big square.
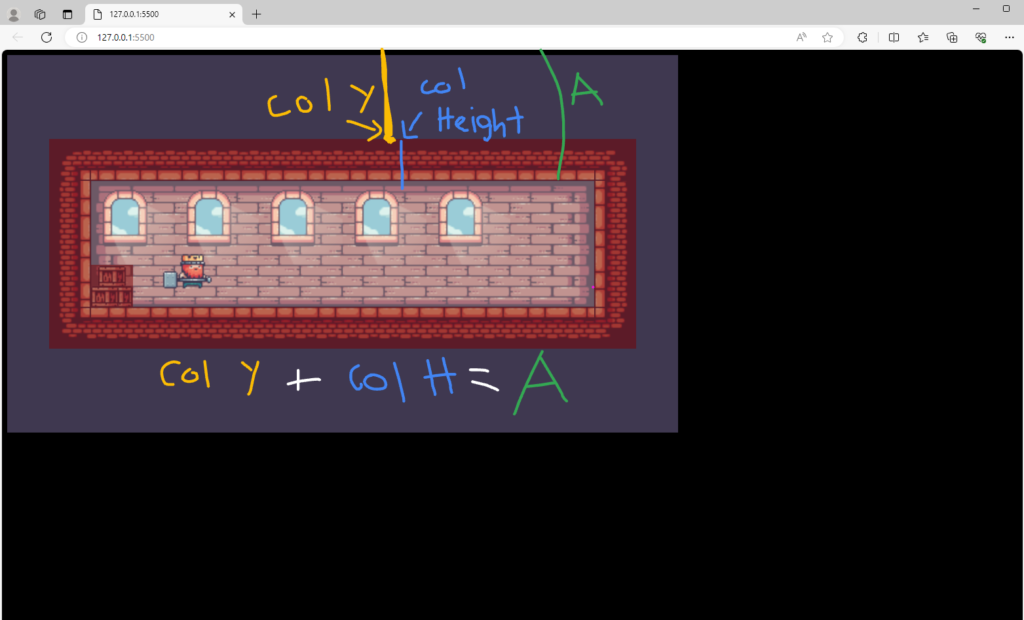
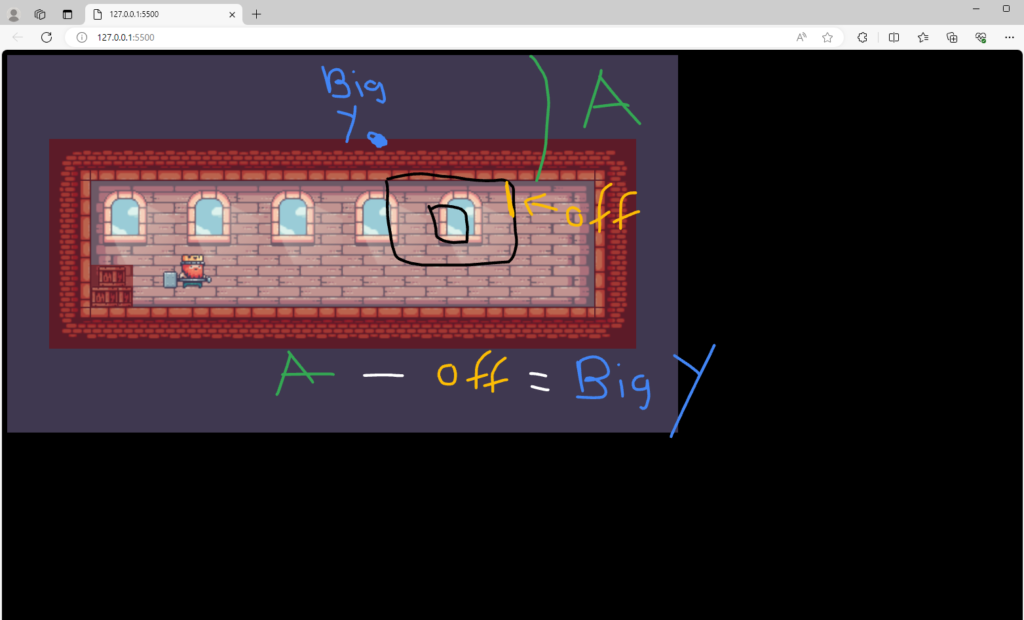
This is how it should look like.
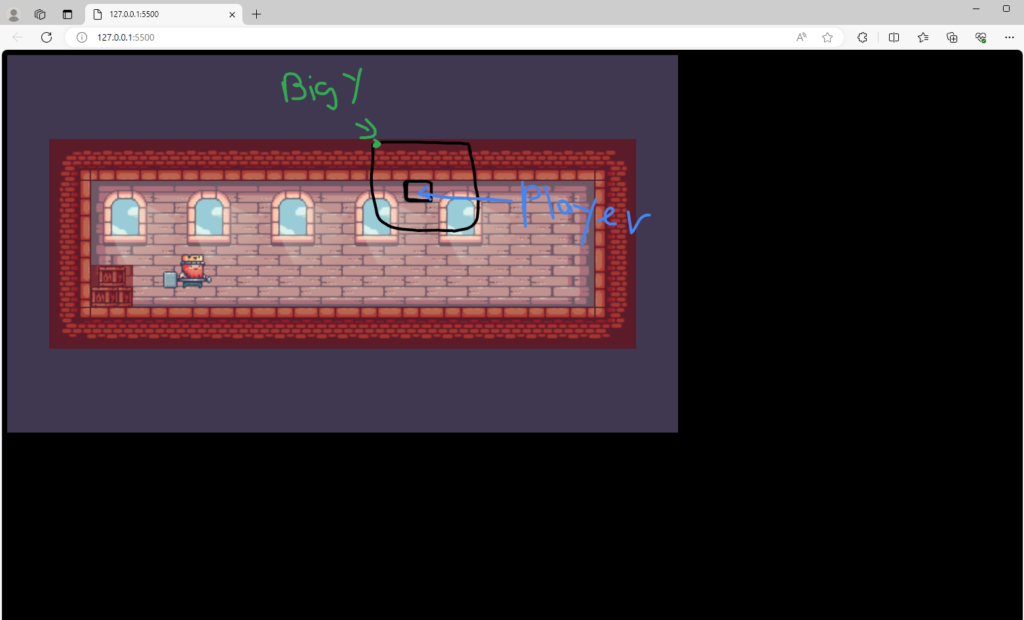
The player can now touch the bottom of the collision block at the top when it jumps. Same as the checkForVerticalCollision() function, change the position of the big square to the position of the hitbox.
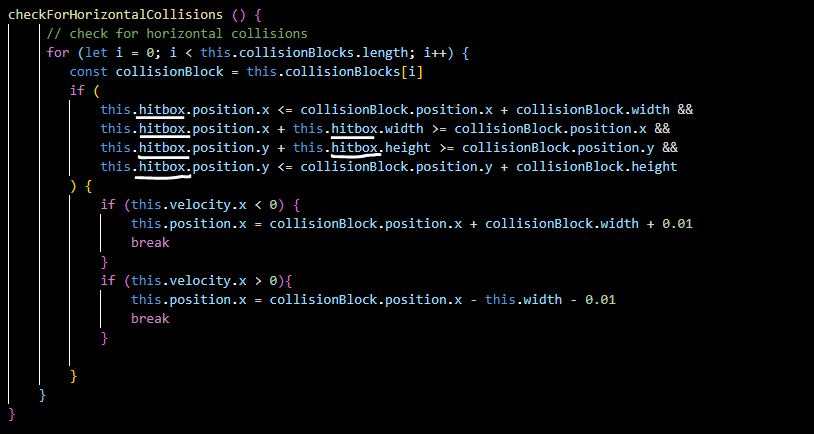
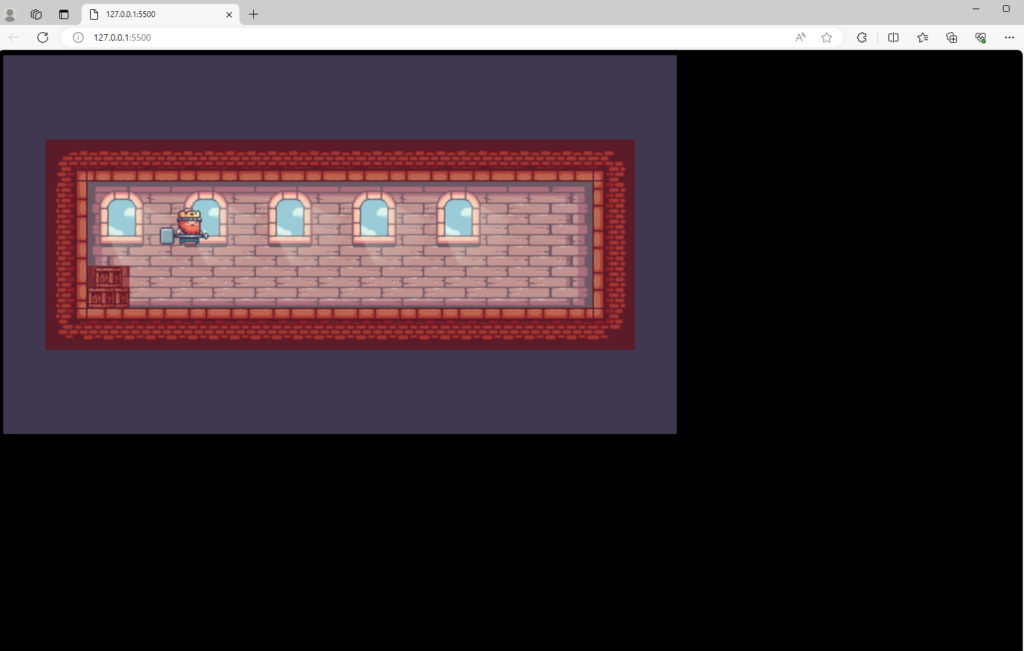
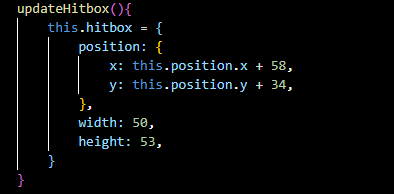
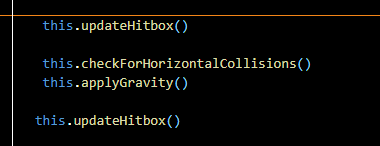
As you can see above, to fix this problem just move the hitbox into a function called updateHitbox(). And call this function two times.
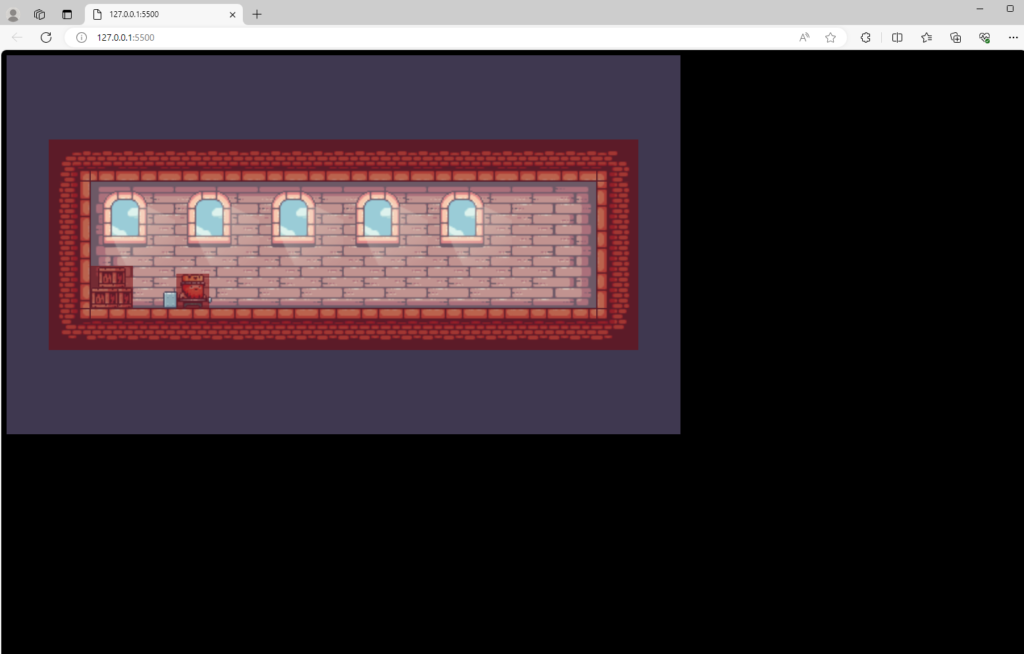
Similar to making the player stand on the ground and touch the bottom of the collision block. Do the same thing as the player goes left and right.


 |  |
Now we can delete the function that we create the red box.
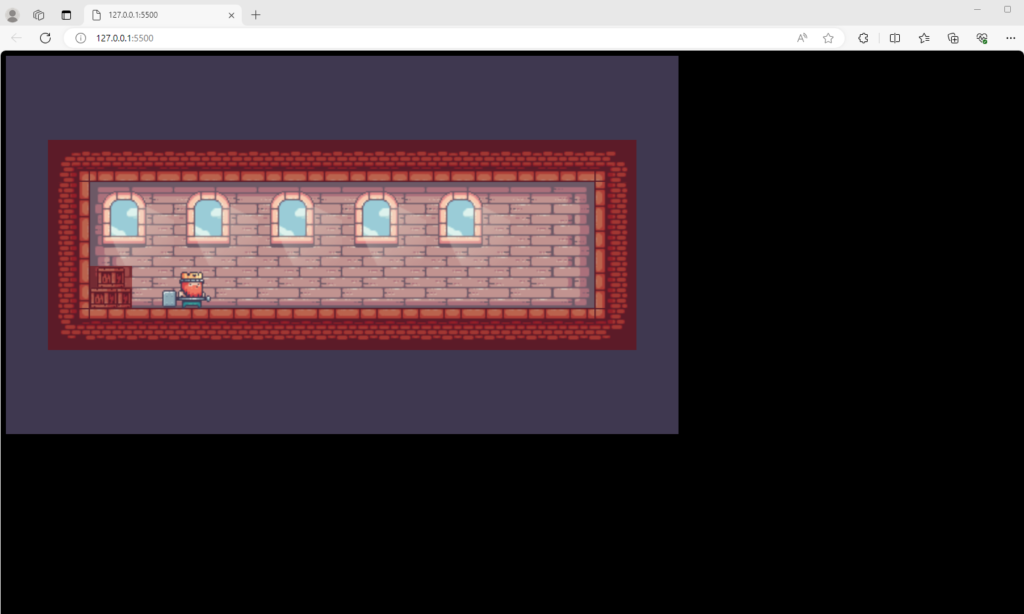
Sprite Swapping
In the “Player.js” file, add an object named animation that contains IdleLeft, IdleRight, runLeft, runRight information, such as frameRate, frameBuffer, loop, and imageSrc.
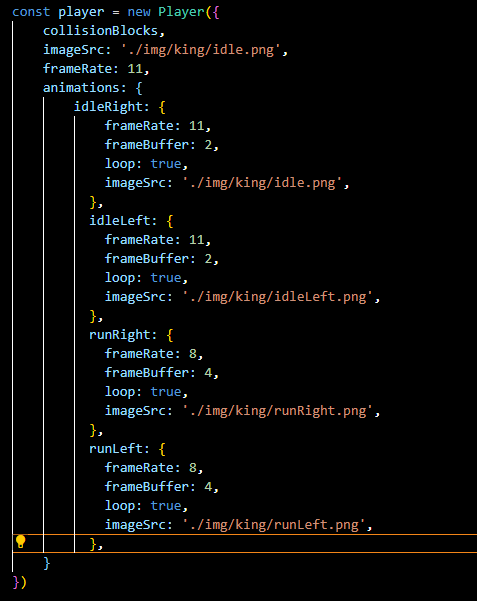
And add this object in the Player’s constructor, Sprite class, and in the super() method.

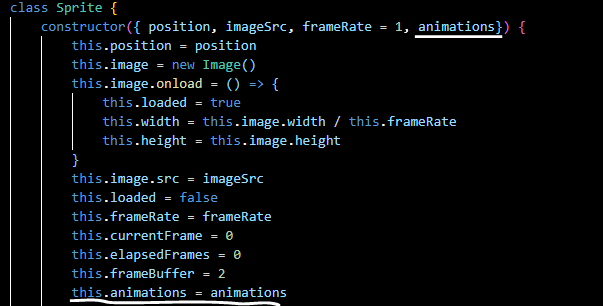
Now use the for loop to loop over the animations to get the image source each of them.The first check is whether the animation exists, and loop over the animations. And get the image source of each of them. Then create a switchSprite() function with a “name” argument to switch the animation when the player is running. Inside this function, currentFrame is 0, the image equals the animation[name].image , the frameRate equals the animation[name].frameRate, and the frameButter equals the animation[name].frameBuffer. When the player moves left, call this function with the “runLeft” argument. And call the function with “runRight” to make the player move right.


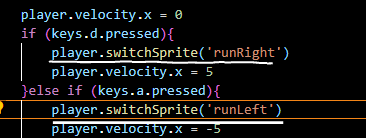
The player now has animations to move left and right.
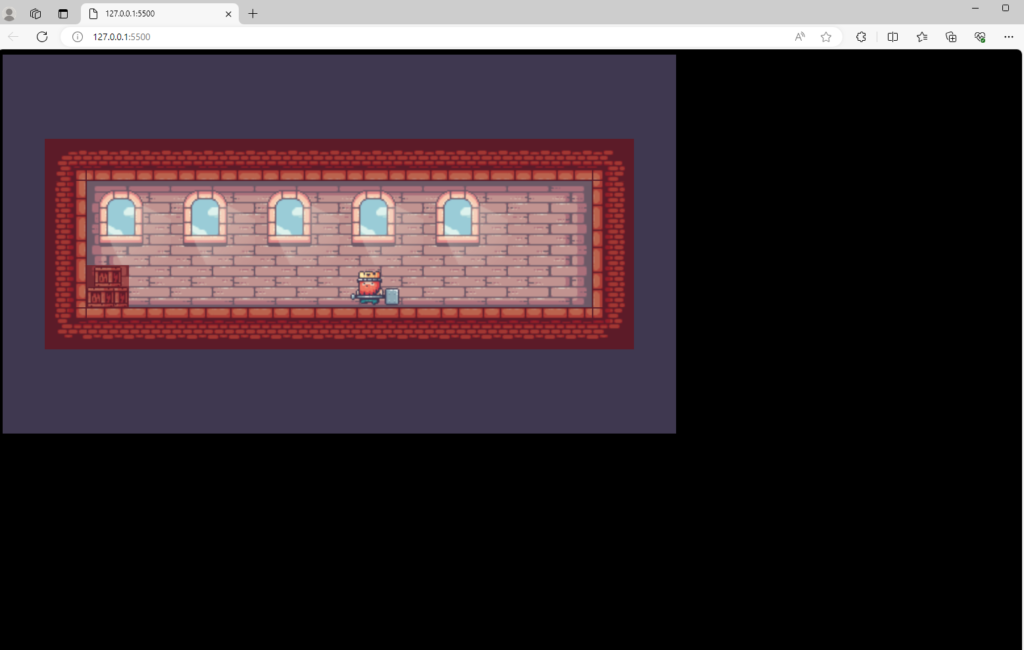
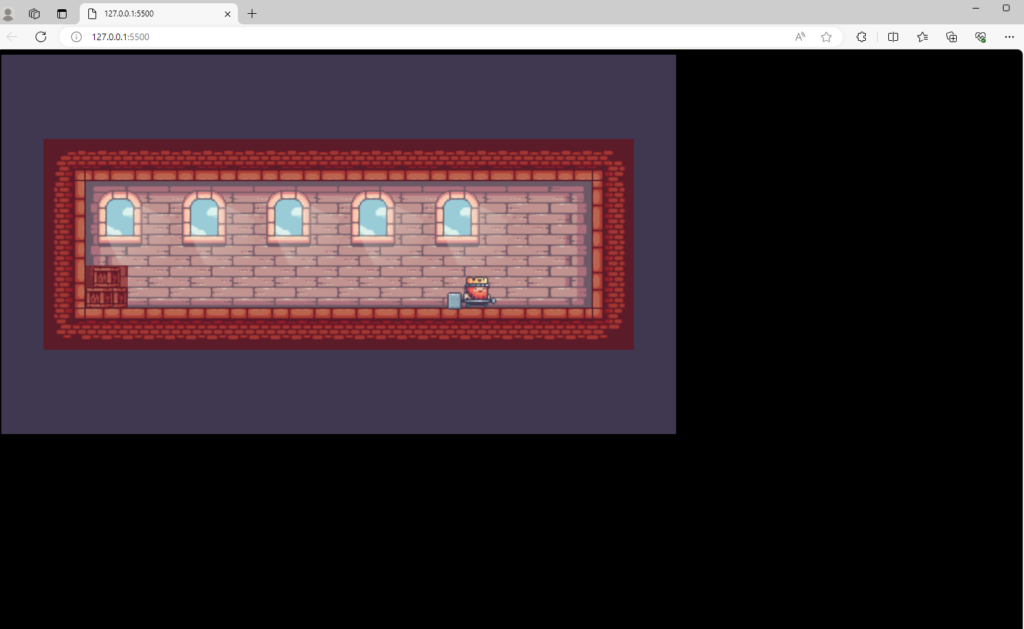
In the switchSprite() function, add an if-else statement to check if the image is equal the animation[name].image, then return the image, frameRate, and frameBuffer of that animation.

And the final step of the sprite animation is to make the player return to the standing animation after it runs. So when the player goes to the left, makes the lastDirection is left, and lastDirection is right when it goes to the right. Then use the if-else statement to check if the player does not run, and its lastDirection is left, call the switchSprite() with a “idleLeft” and otherwise it is “idle”.
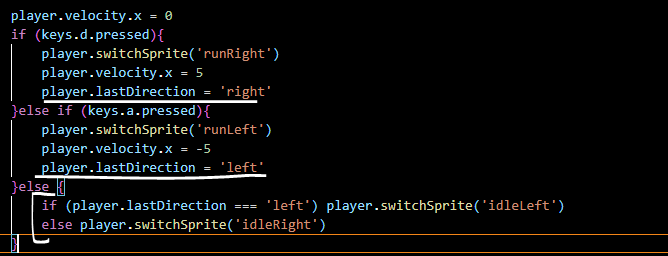
You can see its animation below.
No Responses